Note: Since making this blog post back in July, 2011 a lot of the theories presented here have turned out to be erroneous, specifically the locations of the discarded colossi. For example I mention that Sirius (the boar type colossus) was located at G7 on the map due to the presence of the Stonehenge monument that we see in the art book images, but we later found out it lived on a small peninsula in E8 (which doesn't even exist anymore)! But the most famous example of my lack of knowledge was suggesting that the Phoenix lived at D3 where the current Turtle colossus lives (Basaran). This was disproved by my old friend WWWArea (now SpaceOmega5000) who found texture evidence that it actually lived at i4 in an arena known as 'Crater'.
You have to remember that back in 2011 there was virtually no one else looking into these things except for me... Pikol and WWWArea had left the community years before, so I called myself 'The Last Hacker' back then. This was the 'dark ages' after the Playstation 2 forums had dissolved but before Discord was even a thing. So I only had the game itself and my rudimentary knowledge of the program code i.e. via using a memory or Hex editor to find anything useful or potentially unseen.
I did have my friend, collaborator and translator 'Glitterberri' to help me out at the time, but she has a habit of disappearing for long periods of time... sometimes months, other times years! So it wasn't until January 2015 that I started communicating with a new user named Morlun91. He had some new ideas that challenged my old beta colossi tropes. The result of our collaboration was my 'Beta colossi recap & update' video from April 28th, 2015 (see video link at the end of the Sirius section). This was the newest and most comprehensive info on the discarded colossi that we had at the time and was even profiled in a Kotaku article:
Yet most of what we see in this video is also wrong!
Then in around June 2016, I was posting my findings about what I had found via using the debug menu with ICO on the AssemblerGames forums (which is no longer active) and got an email from a user called 'Wisi'. He was working on getting the debug menu in the Preview version working and after a lot of back and forth messages he finally got a rudimentary version that worked. This was the most impressive thing that had happened since the Preview version was first shared to the SotC community six years before! After this users began to use Wisi's debug menu to look deeper into the game.
From May, 2017 Wisi and I talked for a couple of years via the chat website 'Slack' which I had to pay a yearly fee for... so later we transitioned to the free Discord website around June 2019.
Later, the 'Team Stage 0' Discord channel was created and Wisi and I were invited to be members. The moderator of this channel was a user named 'Lord Unconfirmed' (from Brazil) and it was he who first contacted one of the Japanese developers who had actually worked on the game. This is where all the latest info came from that you can now see on the Shadow of the Colossus Team Ico wiki:
So, in hindsight it's easy to fault me for not getting every detail right... I mean since the 'Team Stage 0' channel appeared a lot of those members have become experts in the game's details via examining what we now call the 'sheets data', which are basically game control file lists made by the developers in Microsoft Excel. From these 'sheets' most of the latest revelations have been discovered.
So what you see below is the blog post I made in July, 2011. Yes, there is outdated info, but I like to think of it as an archive of the time in which it was made... nothing more!
--------------------------------------------------------------------------------------------------------------------------------------------------
The game's creator, Fumito Ueda, originally had 48 colossi in the back of his mind when planning the game, but quickly realized that this was too many and cut the number in half to 24 - the 16 we are familiar with and 8 more that are revealed in the art book. The art book states that the designers '[We] started out by creating the colossi arenas, then figuring out where in the expansive field they would be placed. Since we started out with 24 Colossi, it was pretty huge. The number of Colossi was ultimately reduced to 16, however, and the field was reduced a bit to its present form'.
This is a great understatement! Out of the 100 squares that make up the map, 44 are now unused! That's 44% of the game map that was left unfinished.

NTSC/PAL retail version of the game
Note: even in the retail version there are still some map squares that are off limits, such as B6, D8 and H8. Although H8 can be accessed via Agro launching in the earlier NTSC (US) version, thanks to the discovery by Sid_Tiger aka Toxic_Trace/Willy in October 2008. But when you look at the remaining map squares that have leftover lands you really appreciate just how much larger the original vision of the game once was!

Unused map squares compiled from the both the retail, demos and preview version games
Above you can see just how much land was left out in the retail version. So many map squares with so much potential! Surprisingly, most of these map squares have nothing to do with the discarded colossi, most are just empty lands or those strange blue map squares that have no purpose.

Shrine of Worship with 24 idols from the NICO dvd (all identical 1st colossus)

24 statues are copies of #1 (Valus)
From the above images you can see that in this early build of the game there were 24 statues (all were the same kind, based on the first colossus statue) as at this stage they hadn't created each of the 24 colossi statues. You'll also notice that the stone enclosures are missing, that is the housing that surrounds the statues. Each one is encased in its own niche, with walls on either side and a curved roof above (see below).

Statues in stone niches from the final version

9 standing columns on the west side of the Entrance temple
There is still proof that there were once 24 colossi in the game, but you have to hack the game to see it... at the Entrance temple there are 12 columns on the west side yet only 4 columns on the east side (which represent the 16 colossi we see in the game today), that is on either side of the central entrance that Wander and Agro pass through in the opening cut scene. You can't see this part of the temple in the game, this model only loads during the opening cut scene. It was WWWArea who first worked out how to freeze the cut scene, from there we were able to explore these lands for the first time.
There are 9 standing columns plus 3 fallen columns on the west side of the temple (makes 12). On the east side there are only 4 standing columns, but there is just enough room for 8 more columns - which would add up to 12 on either side (representing the original 24 colossi). It was also WWWArea who first noticed that there were 16 columns, and based on this I realized there was room for 8 more.

Plus 3 fallen columns (makes 12 on the west side)

But only 4 columns on the east side (makes 16)...

with room for 8 more columns (makes 24)

Art book image of the temple showing extra columns on the east side


Temple columns were mirrored in this early version
It's a bit hard to tell from the poor quality of the above images, but you can see both sets of columns on either side of the central path are identical, just mirror images of each other. There is that distinctive three tiered fallen column lying next to two upright columns on either side. So at this early stage they made one set of columns on one side, then just copied and pasted them on the other side in reverse order.
So we can assume that some beta colossi arenas were designed and these should be evident on the world map. I think F0, H2, B3, D3, G7, possibly I7 and B2 (although B2 is very speculative) were likely candidates, so this gives us evidence for 7 of the discarded colossi, some were likely replaced (for instance the Phoenix with Basaran), the others were removed outright.

Most likely beta colossi locations

Map with all colossi added - retail plus unused

Snapshot from the Team Ico Gamers blog about the article (now lost)
It should be noted that Yamori_B did some research on the Shadow of the Colossus/Team Ico wikis and discovered that nearly all the information contained there is made up. Since then I've made contact with an admin of the Team Ico wiki (Kris Van Den Broek) and we have exchanged emails about this issue. The names of the unused colossi and other information is nothing but fiction posted by a user named 'Starkstone'. But the names have now become part of the mythology around these unused colossi and fans like to give the colossi memorable names instead of using the developer names, so I will include them here for that reason. Note: The Team Ico wiki has since been updated with the correct information as we currently have it.
http://shadowofthecolossus.wikia.com/wiki/Unused_Colossi
http://www.glitterberri.com/shadow-of-the-colossus/
http://yamori-blog.blogspot.com.au/
Update (28-07-16): Thanks to a user named 'Kaique' I finally got a look at that rare French gaming magazine article! He sent me a scan of the article but didn't provide any other information about where he got it, which magazine it came from and when. But I've managed to dig up a few more details and with the help of Funkyboy (who is French) had it translated.

French magazine article (remade in Photoshop with English translation)
The article only talks about three of the discarded colossi, the Roc, Phoenix and Spider, but it's Ueda's own words about each one. The information and images appear to have come from another French magazine called 'Chronic'art', a cultural news magazine according to their website. Issue 23 of Chronic'art features the first colossus on the cover, so I would like to get a look at that magazine as it might contain more info on the discarded colossi.
 Here is the translated text:

Director's Cut: From the multiple colossi amazingly designed and crafted by his team, Ueda kept only sixteen. Three of them have become famous thanks to Chronic'art. Explanations and commentary by Ueda himself.
The player had to chase this flying Colossus on horseback and shoot it with the bow to make it fall. Unfortunately, we had some issues with the collision detection between the Colossus and the ground. We couldn't find a viable solution, so we had no choice but to discard it.
The player was supposed to avoid bursts of wind produced by the giant wings of this flying Colossus. For this one we had to create a really large environment. Problem was, we were losing way too much health every time we fell from the Colossus, so we discarded the concept.
To slay the spider shaped Colossus, the player had to strike the legs while riding Agro in order to make it lose its balance and fall. The concept was great in theory but difficult to create in practise. We were unable to make it happen during the programming phase.
Update (05-01-21): Thanks to a user named LordUnconfirmed (a very dedicated and solid researcher), he finally managed to get a high resolution pdf file of the Chronic Art magazine. He received it from one of the publishers who worked on the magazine who still had a digital copy of it!
From that hi-res pdf file we have been able to see those three colossi images with much more clarity than ever before! See here:
24 Colossi Stages
Based on the 'seParam' files from the Hex code (i.e. sound files) Wisi has surmised how the 24 colossi may have been positioned, i.e. in what order the colossi appeared.


Based on the 'seParam' files from the Hex code (i.e. sound files) Wisi has surmised how the 24 colossi may have been positioned, i.e. in what order the colossi appeared.


Note: There is not solid proof that the above chart represents the actual order of the 24 colossi as we are both pretty sure that the Monkey and Griffin never made it into a playable build of the game (based on them both having no sound files). So I came up with another chart that removed the Monkey and Griffin and replaced them with Kuromori_A and Buddha. That is another early version of Kuromori (#8) and a different version of Malus (#16).


Now you may be wondering why the devs would put another Gecko type colossus into the game and another almost identical version of Malus into the game. It seems hard to imagine that they would put two Malus type colossi into the game, but we must remember there is no evidence that a build existed with all 24 colossi, all we know for sure is that they designed and tested some of the eight discarded colossi up to a point then decided to concentrate their efforts on the 16 they most preferred. So the charts above are just our interpretations of how the 24 colossi may have been envisioned to appear in the game, if it was ever made into the full 24 colossi version.

Yamori_A with fur covered back and sigil exposed - very different to Yamori_B

Yamori_A arena?
Remember Dormin's introduction to the 8th Colossus (Kuromori)? 'A tail trapped within a pail, deep within the forest... A shadow that crawls on the walls. There is no forest we can see at the 8th colossus, so maybe this line was referring to an earlier version of the Gecko, that is, one that lived in a forested area. Above we can see (from the NICO dvd) a short video edit of an early Wander & Agro in a forested area. Notice how Wander is covering his mouth with his arm? This animation only happens at the 8th colossus in the final versions, due the the poisonous gas the Gecko releases as its attack response.
Remember also that there are three human type colossi in the game, Minotaur A, B and C or Valus, Barba and Argus. There are also two almost identical lion type colossi, Leo and Cerberus, or Celosia and Cenobia - practically clones of each other. So it doesn't strain the imagination that there could have also been two similar Gecko type colossi or even two Malus type colossi in the early builds of the game, namely Evis and Buddha.

Buddha

Buddha head up close from the art book
Remember that strange world map anomaly which revealed the Malus icon at i4? I think the extra Buddha colossus may explain this weird out of the way icon.

Buddha icon at i4 - Is this the second Malus type colossus?
Phoenix
The SotC wiki claims it was named Adar Flam or 'The Flame Bird' after its glowing wings that were as if on fire, but as stated above this name is made up. But based on the images, we can assume it was around sixty feet tall with carved stone eyes. The battle was fought on a very large arena, the main challenge was to get close enough to the Colossus. The Colossus would constantly flap its enormous wings, sending you flying and stumbling backwards (this action was re-used in the battle with Avion in the final release). The art book says 'Its body was wreathed in flame. You defeated it by plunging it into a lake'. Although there's no evidence of fire in the images perhaps it burst into flame periodically and this was when you had to lure it into the lake?
It was scrapped for two reasons. One, the arena needed for this battle to be effective was much larger than what they wanted to use. Secondly, as stated above, Wander was losing too much health when he fell from the colossus.
It was scrapped for two reasons. One, the arena needed for this battle to be effective was much larger than what they wanted to use. Secondly, as stated above, Wander was losing too much health when he fell from the colossus.


These trees remind me of the dead trees at the bridge leading into 9's area

No evidence of the lake in these images

An image not shown in the art book (source the French article)
I looked around to find a place that matched the Phoenix images. As I said the trees here reminded me of the trees at the bridge to #9's area and sure enough, I found that they matched nicely. There is a distinctive forked tree on an angle that appears to have been moved across the bridge, a small tree that matches the images and two bent trees that are still in the game next to the bridge (see images below).

Forked tree on an angle comparison

Small tree comparison

Two bent trees comparison

The trees don't match exactly but it's pretty close - looks like they added extra branches
Another thing to note is that in the Pre-release (Preview) version of the game there is water in Basaran's cave. It serves no purpose in the battle as Basaran can't hurt you when you are in the water. It's ranged attacks seem to charge up then abruptly stop... so all it does is its stomping attacks over and over. Remaining in the water also prevents Basaran from approaching the geysers so there is no way to end the battle from the cave lake. So it's very odd why there is water there at all, except perhaps that it is a leftover of the lake that once was used in the battle with the Phoenix.
Note: In Dormin's introduction to this area the text has also changed, 'The land where trees nary grow... it sleeps at the bottom of the lake'. In the final version this was changed to 'it sleeps in a dry lake bed...' So here we see that even at this late stage, there was still mention of a lake at #9's area.

Basaran's lake - a leftover from the Phoenix?
Basaran's Lake video here:
Check out my beta colossi speculations video here:
http://www.youtube.com/watch?v=rm0Zldnp8e0
Update: 12-04-16: I found a few lines of code about the Phoenix by searching through some files on the Preview disc. There's a folder called 'Tools' which contains debug files, but as this folder doesn't load when the game boots we have never been able to access the debug options for Shadow of the Colossus.
The files are:
The files are:
SCRPhoenixStart
SCRPhoenixStartB (may have been two start animations)
SCRPhoenixDeath
SCRPhoenixLandingReady
SCRPhoenixLanding (landing after flying perhaps?)
SCRPhoenixFlap (flapping its huge wings)
SCRPhoenixThreat
phoenixSightXZ (looking for Wander?)
phoenixSightYZ
phoenixTurnAngle
phoenixThreatLife (does this mean its life was in danger or Wanders?)
phoenixLost (perhaps it was searching for Wander here?)
phoenixFlyDist (this shows that the Phoenix actually flew!)
phoenixFlyTime (amount of time the Phoenix stayed in the air)
The Phoenix Size Chart
I based its size on the only source we have, the images from the official Japanese art book. In these images you can see the two 'bent' trees mentioned above. Using Wander I measured these trees to be 20m high. In two of the art book images you can see these two bent trees in relation to the Phoenix. One image has it standing very close to the trees, so this is the image I used to determine the height of the Phoenix.


The Phoenix Size Chart
I based its size on the only source we have, the images from the official Japanese art book. In these images you can see the two 'bent' trees mentioned above. Using Wander I measured these trees to be 20m high. In two of the art book images you can see these two bent trees in relation to the Phoenix. One image has it standing very close to the trees, so this is the image I used to determine the height of the Phoenix.

Base of bent tree is 24m (above zero - which we start at the Shrine of Worship)

Top of tree is 44m - makes the bent trees 20m tall

Phoenix size chart - is 34m high - 1m taller than Gaius (#3)
The Roc
The SotC wiki names this one Avus, but again a fictional name. It's actually another bird type colossus but with a head that resembled a frilled necked lizard. Originally, the battle took place on land, instead of over a lake. It was a battle that primarily focused on using Agro. You had to chase it, and try to shoot it down out of the sky using your bow. It was scrapped for two reasons; first, the development team felt that the battle was too similar to the battle against Phalanx, and second, they were having a lot of trouble with the collision detection between the colossus and the ground.

Tattered wings
Note: A myth has arisen about this colossus called 'The Black Bird'. It's mainly centered on Brazilian players who swear they have seen a huge winged shadow fly over Wander at certain areas in the game, mostly in the southern regions. But when they look up, nothing is there! Sadly, not a single image or video ever was produced to confirm this myth, and as we know from the SotC viewer, there are no extra colossi models in the game data. So I think they are mistaking hawks for this so called 'Black Bird'. Perhaps someone was just in the right place as the shadow of a hawk flew past, there a lots of hawks in the southern regions of the map, sometimes you can have as many as five or six hawks following Wander and Agro. Thus the myth gained strength until it got out of control.
You can read more about this myth here:

Fought over a dry lakebed


Starts out like Avion perched on its tower

H4 comparisons between versions
It seems the Roc was another flying colossus that was included in the game along with the Bird (which later evolved into Avion) and Phalanx. So it appears at one time there were three flying colossi instead of two. When the map was reduced they scrapped those colossi that were proving troublesome, and sadly the Roc was one of these.

E4 mountain matches art book image
I went looking for a mountain that matched the one in the above image, I thought I would find it around #9's area as it has some triangular shaped mountains there but none of them matched... also it wouldn't make any sense that the Roc lived in the same area as the Phoenix, so I kept searching until I did find one that was close but not an exact match. It's in E4 right above the cave you enter to approach the forest from the north. You can see in the image above the mountains look similar but not identical in any way, it's probably just a coincidence as it seems clear that the entire arena that the Roc existed in was deleted.
But Morlun91 seems to have found a more likely location for the Roc, and from what I can see it matches what we see in the art book image quite well. If you recall from my 'More map mysteries' video I found a previously unseen map square (at B3) hidden away in the OPM demo program code. It is the only one of its kind across all the versions of the game we can access, and being the earliest build of the game we know of it appears to show an early colossus lair that was removed from the game (see video here):
I had always wondered if this was a discarded colossi lair but never had any proof, but thanks to Morlun91 it seems to match the Roc's area quite well. Of course, all we have is this one low res map square to base any evidence on, but if we are looking for a wide flat plain with low profile hills surrounding it and a mountain in the distance, it fits.

'slow_b3_mip' map square from the OPM demo code

B3 map matches the art book image
Above we can see the mountain (outlined in red) and the low profile hills (blue) surrounding a large flat plain. In the center is the Roc's pedestal (just a small black dot). Wander's path in shown in purple. I've had to rotate the map to match the art book image as perspective can be a tricky thing, but from what we see here it matches quite well.
The other thing to note is the soft hued mountains in the background of the art book image, these appear as a washed out green colour, and beyond these are clear skies. The area surrounding the B3 map square is empty, so this is consistent with the art book image. There appears to be only one entrance to B3 (marked in purple) as with most of the colossi we see today, but this path would lead to the flat plain instead of the low profile hills surrounding it. But we can surmise that there was a path leading up to these hills that would have provided a wide view of the plain. So in the final analysis, I am confident that B3 is the best candidate for the Roc's lair.
Note: This is the only unused colossi that we have any video footage of, just a few precious seconds that was released by Kikizo.com. I wish I could find out where they got this footage as it's not on their website anymore. Perhaps if we could find out who originally posted it we could track down some others?
Update: 05-10-16: I just received a rare promo video disc from Mexico which has the original video file of the Roc. So finally we know where Kikizo.com got the footage! It's part of the trailer we had seen before on the NICO dvd, but with a few changes - namely, the Roc is shown where in the NICO video we see Gaius in its place. So this video has never been seen before until now! Note the file date is 24th August 2004 at 8:07PM, long before the first official OPM trailer was released.

Rare video promo dvd from Sony (circa 2004)

Inside video case with unique printed dvd

You can see this dvd in the interview section of the official art book - a rare find!


Detail of the Roc's tail - ignore Agro tail as it interferes with the Roc

You'll notice the ruins on the ground in the above image seem to match those of the Roc image from the artbook. There appears to be a column that has an odd shaped profile and what looks like a bumper surrounding it. Perhaps some of these ruins have fallen off the main pedestal structure over time?
See my Rare Promo video here: https://youtu.be/eWH3-kSBdXQ

Early 'Alpha' version of the Bird
In the above image we see an early version of Avion. Notice how the tail is much shorter than the final version of Avion, this is discussed in the art book, 'You were supposed to climb up using its tail, so that’s why it’s so long'. In the final version you use an arrow to gain the attention of Avion, but it seems they played around with other ideas, so the long tail is an unused remnant of an earlier Avion.
It's not clear when the water was added to Avion's arena, perhaps Wander had to swim to the colossus perched on its column in order to grab hold of its tail? If not, and the area was devoid of water (see H4 map comparisons above), Wander could ride Agro towards the colossus then leap off to grab onto its tail? From the Demo/Preview maps it seems at one point there was no water here.
Check out my NICO development builds video here:
Sirius
Apart from fighting it while riding on Agro not much is known about this colossus. The art books gives little information except that it was scrapped because it didn't work very well in execution, 'the way to defeat it just wasn't turning out'. But it was obviously a fast moving colossus and if you look carefully there is a clue in the art book about how you fought it.

Rocks meant to be used in the fight with Sirius
This picture shows the Stonehenge type rocks we see at G7 in the game but with different surroundings. The caption under it reads 'Rocks meant to be used in the fight with Sirius', so perhaps you had it chase you between the rocks, Agro & Wander make it through the tight space but Sirius gets stuck! You dismount and attack its weak point (wherever that was, most probably on its head)? This also raises the question did Sirius exist at G7 where the Stonehenge rocks now stand, or were they in some other location? There's no way to be sure, but at least the Stonehenge rocks are still in the game, recycled from a beta colossus ; )

Stonehenge monument at G7 in the game

Sirius stuck between Stonehenge rocks (montage)

Sirius at Stonehenge (montage)

Wander being chased by Sirius (montage)

Here you can see these other stacked rocks next to the stonehenge structure

Here they are again (images from the NICO dvd)

So I went looking for them and found these similar rocks as D5
Update: 15th April, 2019
A Discord user named 'Aith' has found a group of stones I seemed to have missed! As in the image above, I thought the stones at D5 might be a match, but I was wrong! I mean, we all make mistakes right? xD. But Aith found a set of stones very close the to the Stonehenge rocks that I had missed (despite my having travelled all over this area numerous times ; )
Just a little way to the East of the Stonehenge rocks, there is a small pile of stones laying in the middle of the field of grass - hard to see unless you ride up close to them. Just a nondescript pile of rocks. But they match the art book image via the moss/vines seen on the boulders. There is no doubt, these are the same rocks as seen in the art book, but just placed in a different location in later builds.

Aith screenshot of G7 rocks

Confirmation of G7 rocks

Art book comparison of G7 rocks

A screenshot created as a mock-up
Above we see an image that is shown right next to the G7 rock formation shot in the art book. It looks similar to the G7 rocks image, Wander is resting against them with Agro standing attentive nearby.


 Wander resting against a rock next to the tree with Agro at his side

Above we can see the tree is very close to the camera. Some fans thought this was one of the Stonehenge rocks, but it's clear from the image that, from this perspective, this is the camera viewing Wander and Agro from close up to the trunk of the tree. In fact you can still see these trees in the opening 'Forest' cut scene.

Same tree textures can be seen here

You can also see this tree right next to the Stonehenge structures in one of the NICO dvd videos: See here: https://www.youtube.com/watch?v=1RjnI64Rwqs&#t=4m

Resembles an armored pig

In hot pursuit of Wander

Sketches of Sirius from the art book

nto/sz_hn_sirius_hifu07_f.nto
And here's an actual texture from Sirius! Team Ico didn't completely delete Sirius from the code it seems, there are a few animations left and this one texture (found by HyperSNES). If the model still existed I could watch those animations, but sadly it's doesn't.
Sirius Size & Stonehenge
In a recent video I spent many hours to move Cenobia (#14) at C2 all the way down to the southern lands at G7 on the world map where we find the Stonehenge monument. I used Cenobia as it's also a four legged fast colossus as Sirius appeared to have been, yet much smaller in size. But I wondered how much bigger Sirius was to Cenobia as opposed to Wander's size... I also wanted to know just how wide Sirius would have to be to get stuck between the Stonehenge rocks. So I measured the gap between the Stonehenge standing stones, then made Cenobia run between them.


Update: I used another colossus model (Celosia #11) to view the animations, but all it did was walk backward three steps. So at least we know for sure that at one time Sirius walked backwards, perhaps it was afraid of something or this was how it removed itself from the Stonehenge rocks?
See my updated 'Beta colossi ~ recap & update' video here:
https://youtu.be/5Do_0aWpYeo
Sirius Size & Stonehenge
In a recent video I spent many hours to move Cenobia (#14) at C2 all the way down to the southern lands at G7 on the world map where we find the Stonehenge monument. I used Cenobia as it's also a four legged fast colossus as Sirius appeared to have been, yet much smaller in size. But I wondered how much bigger Sirius was to Cenobia as opposed to Wander's size... I also wanted to know just how wide Sirius would have to be to get stuck between the Stonehenge rocks. So I measured the gap between the Stonehenge standing stones, then made Cenobia run between them.

Cenobia between the Stonehenge standing stones
You can see, there is still a lot of space left over, so this tells us that Sirius would have to be much larger (and wider) if its purpose was to get stuck between the stones. Note: As elegant and obvious this idea of Sirius charging between the Stonehenge monument seems, we still have no evidence that this actually happened, but if (as Ueda states) these 'Rocks [were] meant to be used in the fight with Sirius', I can see no other explanation as to how they were used. For instance, we could imagine Wander trying to hide behind the rocks to keep out of sight of Sirius, but any large free standing rock could serve the same purpose... the unique feature of this monument is the gap between the two large standing stones.


Sirius stuck between the Stonehenge rocks
From my calculations based on the width between the Stonehenge standing stones and the (approximate) size of Sirius based on the art book images I determined that indeed Sirius was wide enough to get stuck. So we can imagine a scenario where Wander dismounts from Agro and has just enough time to run around behind Sirius, jump on its back and start stabbing it! It seems from the front its head may have been too high to reach, but from behind you could presumably jump onto its leg fur then climb onto its back, where a glowing sigil would be waiting (again sheer speculation).
See video here: https://youtu.be/B237YVIjoso

Sirius size chart
See my updated 'Beta colossi ~ recap & update' video here:
https://youtu.be/5Do_0aWpYeo
The Spider
The SotC wiki names this one Aberth which is Welsh for 'Sacrifice' (another made up name). The only images we have of this colossus are three found in the art book. It had 6 legs (so not technically a spider which has 8 legs), each with a vulnerable point which was like a metal blade, its main weak spot was on its body high above you. You had to ride around on Agro and swipe at each leg with your sword. Once each leg was hit, it would fall to the ground giving you access to its weak spot. You then ran up to its body and jumped into its mouth, which was slack jawed at the time. Presumably you would get a couple of sword stabs in before it got back up again, so you would have to mount Agro and start the process again (Note: this swiping action is still present in the OPM and PSU demos, you can swipe sideways while sitting or standing on Agro). It is also stated that it could kill Wander in one hit, presumably with one enormous stamp of its legs, this can happen today if you accidentally run under the foot of a colossus! For instance Valus or Phaedra.
It was removed from the game as it turned out to be too difficult to hit the legs from the horse, so Wander would have to dismount and hit each leg from the ground. According to the art book, 'it was defeated by leading it from water to land', so it must have lived near the ocean or a lake.
It was removed from the game as it turned out to be too difficult to hit the legs from the horse, so Wander would have to dismount and hit each leg from the ground. According to the art book, 'it was defeated by leading it from water to land', so it must have lived near the ocean or a lake.

Lived near the bridge but where was the water?


'Attacking it's legs destroyed its posture'
The cliffs in this shot look a lot like the beta cliffs found in the Preview version of the game at G0. They appear to be on the coast so my idea is that this is where the Spider lived. It's right next to the bridge and would have been on the coast, a sandy beach leading up to the cliffs. However, you will notice in the above image that the bridge support is facing South, in the final version the bridge supports always have the 'curved' edge facing North. This means the Spider was stomping around on the 'West' side of the bridge but the G0 cliffs in the Preview version are found at the East side of the bridge.

Spider lived on the West side of the bridge
Above we can see where the Spider lived as shown in the art book image (red X). The southern cliffs were once textured like the inset image and the Entrance temple was not present at this point. You can see how weird the Entrance temple looks, floating above the bridge like this! I made this image using the final version of the game (via the SotC viewer). It seems clear to me that the Entrance temple was added later (after the Spider colossus was removed), leaving the low res bridge as a remnant of what once existed there.This is confirmed by the early game maps which don't show the Entrance temple.

G0 beta cliffs from the Preview version
Here we can see the similarity of the G0 beta cliffs to the Spider's arena. A bridge support can be seen in the background so the cliffs were much closer to the bridge, however, the model has been cut along the red line so there was more of it at one time and it would have extended further west towards and beyond the bridge. It's like this part of the model was chopped out leaving what we see in the Preview version of the game. Why they left the East side of the beach in the Preview version is a mystery, among many other mysteries that only the developers at Team Ico can answer.

Main bridge behind the entrance at F0 with textures turned off
In the game the main bridge extends beyond the entrance, no other model does this, so if a structure goes into a mountain it will only extend beyond it a couple of feet, for example, the front gate at Avion's arena extends just a couple of feet beyond the cliff wall, I have moved Wander behind the cliffs to make sure, but here it extends way out into the next quadrant. So I have surmised that this extension is a left over from the Spider battle. Perhaps once there was an ocean or lake here on the shores of the sandy beach where the Spider lived.

'The top of the Spider's head'

'Wander's garments were originally light blue'

Here's another image of the Spider which may have originated from an old Japanese press site called 'Watch Impress' (currently inactive). It's a different design to the art book images as it has sharp spikes around its feet and giant feelers reaching out for Wander. There's also no evidence of its horned mouth on the underside of it's body, however this may be obscured in shadow.
According to Ueda, 'At the first public debut of Shadow of the Colossus, several Colossi were displayed in material distributed to the press. The bird-type Colossus and spider-type Colossus were nearly completed. The Spider was meant to be defeated by slashing it with your sword while riding Agro, but that would have required us to put in a special motion just to battle that Colossus, so I didn’t think it was very elegant. However, the idea for defeating that one was resurrected in the Turtle (the 9th Colossus).
The problem with Ueda's statement above 'but that would have required us to put in a special motion just to battle that Colossus' is that they 'did' put this special motion into the game! The sword swiping animation still exists in the OPM and PSU demos and serves no purpose when fighting the first colossus (the only colossus you can fight in the demos). I have even taken Agro up into the 1st colossi's arena in the OPM demo to see if anything happens by using the 'sword swipe' motion but it had no effect.
According to Ueda, 'At the first public debut of Shadow of the Colossus, several Colossi were displayed in material distributed to the press. The bird-type Colossus and spider-type Colossus were nearly completed. The Spider was meant to be defeated by slashing it with your sword while riding Agro, but that would have required us to put in a special motion just to battle that Colossus, so I didn’t think it was very elegant. However, the idea for defeating that one was resurrected in the Turtle (the 9th Colossus).
The problem with Ueda's statement above 'but that would have required us to put in a special motion just to battle that Colossus' is that they 'did' put this special motion into the game! The sword swiping animation still exists in the OPM and PSU demos and serves no purpose when fighting the first colossus (the only colossus you can fight in the demos). I have even taken Agro up into the 1st colossi's arena in the OPM demo to see if anything happens by using the 'sword swipe' motion but it had no effect.

Here's my rendition of what the Spider may have looked like
Note: when I made this image I put Spider on the wrong side of the bridge... but you can still get a sense of what the battle may have looked like. I'm currently working on a 3D model of the Spider, but texturing it will be another matter as I'll have to create each texture in Photoshop then import them into Maya to texture the Spider.

Spider model work in progress

This early image from the art book shows the Entrance temple with columns on either side of the central passage, but it also features an early health and grip HUD which suggests that this was once a playable area. Although the weapons icon is missing here? Only the grip and health parts of the HUD are visible... so what does this mean? Wander would have had to climb up the temple, then makes his way along the vast length of the stone bridge until he arrived at the the Entrance temple. From there he could pass through the Entrance temple and move on to the F0 quadrant.

Is this Wander standing behind the tree in this image?

Retouched montage of the art book image
See video of this here: https://youtu.be/8n8_3KPyH7I#t=7m9s
I have speculated that the strong gust of wind that prevents Wander from leaving the the game at the Entrance temple we see today was added later when they decided to removed the Spider colossus. It was a 'quick fix' that sealed off the F0 quadrant, they deleted the lands and the Spider leaving only a low res version of the stone bridge as a remnant of what once existed.

Wander fighting against the wind spell at the Entrance temple
When Emon and his soldiers arrive at the Entrance temple in the final cutscene, they have no problem entering the forbidden lands, and later have no problem leaving them. This is because they were still pure, they didn't receive any of Dormin's dark influence. So when Wander climbs up to the Entrance temple after receiving enough grip strength to climb the temple (in the final PAL/PS3 version mind you), he is so tainted by Dormin's dark energy that there is no way to push past the spell. It's like an alarm system set up to recognise Dormin's presence.
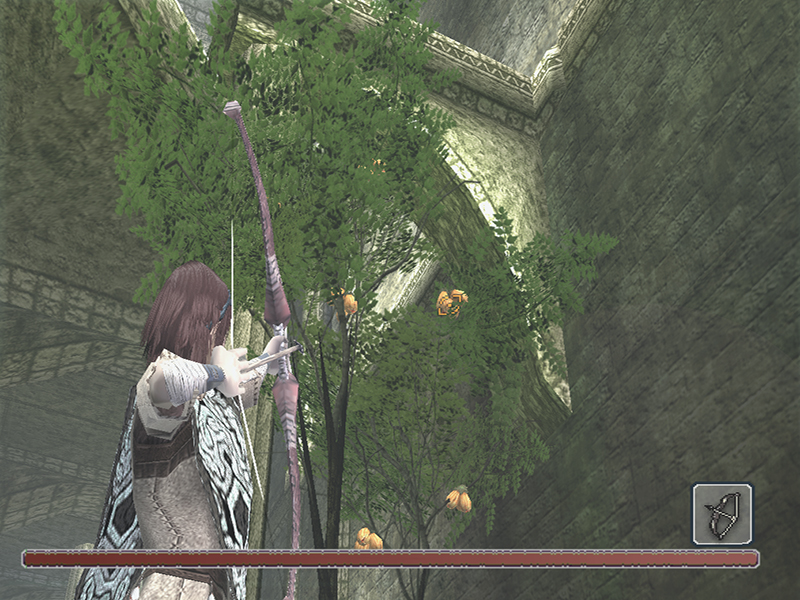
Forbidden fruit
But here we arrive at problem. Udea stated in an 1UP interview with Nick Suttner 'The fruit in the ancient land was set to get you closer to non-human existence. The [secret garden's] fruit was set to return you to a human one.' So in theory, once we eat enough pieces of the forbidden fruit to reduce Wander's grip and health meters back to normal (that is to a pure human mode), we should be able to leave the forbidden lands. But this does not happen! It seems we are forever tainted by Dormin's darkness. This would explain why a small part of Dormin remains in Wander after he is exposed to the beam of white light at the end cutscene, Wander's body was reverted back to its infant form, yet he now has two small horns protruding from his forehead.

Infant Wander is still tainted by Dormin's darkness
So even if we eat all the forbidden fruit to reduce Wander's grip and health meters to their original values, we still can't leave the forbidden lands. There is a surplus of Dormin's darkness that can never be removed! This is why Wander can't pass through the Entrance temple wind spell, and why he has two tiny horns once he has been purified by the intense energy of the beam of light at the end cutscene.

Fixed and non-fixed clouds intersect above G0
When a colossi dies a beam of light shoots up into the sky dispersing the clouds above its arena. So by examining the clouds that appear on the world map we can see where the discarded colossi might have lived. The green clouds are the 'fixed' clouds we see in the final versions of the game (the NTSC & PAL versions). The red clouds are from the demo games and the pre-release (preview) world maps. When I overlay both sets of clouds onto the world map we can see where they intersect, which indicates where there might have been unused colossi lairs. Note: I got this idea from Yamori_B (see link to her blog at the start of this post). Above we see the clouds intersect above G0, so this might be part of the Spider's lair?
See 'Maps & Clouds' video here: https://www.youtube.com/watch?v=C_y5B0HtXac
The problem with this idea is that the three Spider images we see in the art book show the Spider on the west side of the bridge (in F0) and it seems unlikely that the Spider could have crossed through the bridge into G0. All we know is that it lived on the west side of the bridge somewhere. So this is one instance where the clouds idea falls apart.
In a recent interview with Fumito Udea by Daniel Robson for Edge Online Magazine Ueda stated 'The map in the game is designed to house 16 colossi. In other words, because the placement of those 16 colossi determined the shape of the map, it would be a completely different map if we'd included all 24. The intention was to choose the 16 best colossi and focus on making those ones even better. I think we were halfway through production when we decided to reduce their number'.
And as stated above at the start of this post we have more evidence of the reduced map, 'We started out by creating the colossi arenas, then figuring out where in the expansive field they would be placed. Since we started out with 24 Colossi, it was pretty huge. The number of Colossi was ultimately reduced to 16, however, and the field was reduced a bit to its present form'.
They say 'it was pretty huge' so we can imagine a much larger map than what we see today, perhaps containing more than 16 colossi, maybe not 24 (as some were replaced with others), but definitely a larger, more comprehensive map than we see today. Note: As far as we can tell from the evidence there was never a 'different' map, it was the same map we see in the game today, just with more map squares used to house colossi.
Update: 12-04-16: I found a single line of code referring to the Spider which says:
spiderMotionRatio
The Worm
The SotC/Team Ico wiki names this one Dionin and says that it was the 'only Colossus ever to be triggered by defeating another Colossus in the same location' this is complete fiction! A user named Stakestone made all this up, including the name. He even went so far as to write Dormin's introduction to the Worm: 'Thy should search for the nightmares of mortals, the darkness knows no mercy or regret, the writhing horror waits to devour thy soul in the hellish dark'.
The Colossus was removed from the game for being too powerful for the player and requiring a huge arena to be able to dodge its attacks (note: even this sentence is unconfirmed - from what I can gather it was originally posted on the Team Ico Gamers blog, but until I have solid confirmation of this we must consider this as speculation). Its weak spot was inside the bulb of its head.

B2 map square extending into C2
If the Worm's arena was once much larger, we can imagine it extending over two map squares as in the above image. We know that in the final version each colossus only ever occupies 1 map square, but perhaps in development some needed more space? This also appears to be the case with the Devil and the Phoenix. If you visit B2 in the Preview version you can see it's not very big, in fact it looks like just the end of an arena, the rest has been chopped off leaving a clean line and nothing to the East. So perhaps this was another reason why these colossi were deleted, they required too much space and the devs ended up settling for the 1 colossi = 1 map square rule.

B2 beach like area model - cut along its East edge
The best evidence I have at this time is B2, based on the beach like cliffs which match the art book image of the Worm and the fact that B2 is right next to Cenobia's arena (C2) which was the last colossus to be added to the game. We can confidently say this as in all early maps found in the various versions (including the demos) C2 (#14's lair) is always missing, but all the other 15 colossi are still present.

Early maps show an empty C2 square

B2 map square showing a sandy beach like area with cliffs
Speculation: We can imagine Wander arriving at the desert arena. Wander would ride Agro across the desert until suddenly the Worm would make its appearance. It would rise out of the sand and make its way towards Wander, perhaps at a good speed as Dirge (#10) does today. If it caught up to you, you would be thrown off the horse and injured, just like with Dirge. It would then dive down into the sand and disappear. Wander would have to use his sword to pinpoint its location (the way we do today when Phalanx is under the sand). As soon as it re-appeared Wander would charge to its position on Agro, leap off and grab on! Climb up its fur covered, snake like body, then jump into its mouth. Once inside its mouth, you would only have a short time to stab its weak spot (sigil) before being unceremoniously spat out onto the sand (the same way you are kicked off Phalanx when it dives head first into the sand). Rinse and repeat a couple of times and the Worm would die in a dramatic cut scene!

Note: the cliffs look to be far away in the distance

Art book image with B2 cliffs in the background (montage)

'The flower bulb-like section was its weak point'

Photoshop montage of the Worm attacking Wander at B2
And below is the statue texture of the Worm that is still in the game code today. You can get a sense of what it looked like from this poor quality image which reveals its circular mouth and seven mandibles. The three worm/snake type statues in the Shrine of Worship look like this, just with different heads.

hn_sz_stone_worm_snake_04f.nto

boss_worm.nto

load_boss_worm.nto
Above are two textures of the Worm that are still in the game code, one which seems to be for the Worm itself and the other which appears to be a loading screen for the Worm, or perhaps part of the cut scene which introduces the Worm? Again, it's hard to piece together any coherent details about how these textures were used as we have so little to work with. What might be more likely is that the 'boss_worm' texture relates to the black streamers that pass through Wander's body each time he slays a colossus, as they are 'worm' like and the texture appears to resemble the black streamers or tendrils? This also may be true for the 'load_boss_worm' textures as it has that same colour pallet i.e. dark with a lighter outer edge. So they may have nothing to do with the discarded colossus but rather they are textures for the black tendrils instead.
These textures are mentioned in a Game Trailers Pop Fiction video, 'Is there a 17th Colossus?' Video here:
https://www.youtube.com/watch?v=Wjd1_sM3ULs
The fact that Ueda shared as much as he did is pretty cool. However, from the EDGE interview, it’s apparent he does not want people combing through the code for his “work of art” in order to get more insight. Many Japanese developers have an adversity to the use of hacking/cheat codes to probe the game’s inner workings, and always shy away from discussing findings made in that fashion.
I’ve encountered it all too often. So sadly, I feel that Ueda will not speak further on the matter, and his team (and former colleagues) probably have strict instruction to not divulge details without Ueda’s consent. I encountered this with the Sonic 3 stuff I was digging into, as well as anything related to any Nintendo or Square Enix game we’ve covered on the show.
Square Enix outright has a policy to decline interview requests regarding retro titles (interviews now can only be setup on the basis that it’s for a current or upcoming product). Nintendo routinely declines to comment on anything that isn’t related to a current or upcoming product, too.
With anything Team ICO, it’s hard to get access now especially after all the fuss regarding The Last Guardian. EDGE is probably one of a handful of places that could score such an interview, so that’s great they got access to Ueda. Sadly, Western developers are more open to discussing the inner workings of their games, especially about mysteries, glitches, and unused content.
Update: 12-04-16: I found many lines of code about the Worm by searching through some files on the Preview disc. Some of these files may be referring to other program code... not sure, but most seem to be about the Worm. The files are:
boss_worm
SkelFocusDef_WORM_HEAD1
SkelFocusDef_WORM_HEAD2
SkelFocusDef_WORM_MUNE4
SkelFocusDef_WORM_KUBI4
nico_calcWormGenealogicalNodeDownNext
nico_calcWormGenealogicalNodeDownNextLast
nico_restartWormGenealogicalNodeFromDemo
nico_calcWormGenealogicalNodeNextBase
nico_calcWormGenealogicalNodeTailBase
nico_restartWormGenealogicalNodeFromOtherIK
nico_calcWormGenealogicalNodeNext
nico_calcWormGenealogicalNodeHead
nico_calcWormGenealogicalNodeHeadBase
nico_calcWormGenealogicalNodeDownHead
nico_calcWormGenealogicalNodeDownTail
nico_calcWormGenealogicalNodeTail
SCRFuncResetWormCtrlParam
SCRFuncSetRotColCheckWormCtrlParam
SCRFuncResetAcceleParamWormCtrlParam
SCRFuncSetAcceleParamWormCtrlParam
SCRFuncSetSpeedByHorseForWormCtrl
SCRFuncSetDistByHorseForWormCtrl
setWormIKNodeLimit
setWormIKBanterpSec
setWormIKBoundDynamics
setFallGravCoffWormCtrlWork
setAttainSpeedWormCtrlWork
setAcceleParamWormCtrlWork
setRotColCheckWormCtrlWork
setWorldPitchLimitWormCtrlWork
setLimitTurnWormCtrlWork
setAttackParamWormCtrlWork
setMaxFallSpeedWormCtrlWork
setOffsetParamWormCtrlWork
setUnderFrictionCoffWormCtrlWork
setGroundFrictionCoffWormCtrlWork
updateWormCtrlWork
createWormCtrlWork
resetVelocityWormCtrlWork
deleteWormCtrlWork
initWormIKWork
getWormIKWork
CsvRoot_scr_wormstatus
CsvRoot_worm_movectrl
ReflectIK_initWormDynamics
If you have any thoughts about these lines of code please leave a comment below.
These textures are mentioned in a Game Trailers Pop Fiction video, 'Is there a 17th Colossus?' Video here:
https://www.youtube.com/watch?v=Wjd1_sM3ULs
Note: Micheal Damiani from Gametrailers contacted me before creating this video, we exchanged lengthy emails about the detailed lore of the game, I provided him with all I knew about the myths of a supposed '17th colossus' and much more. Michael informed me about the problems faced when trying to gather information from Japanese game developers: Unfortunately, it’s extremely difficult to get Japanese developers on the record about anything regarding unused in their games or even the specifics of the game’s development.
The fact that Ueda shared as much as he did is pretty cool. However, from the EDGE interview, it’s apparent he does not want people combing through the code for his “work of art” in order to get more insight. Many Japanese developers have an adversity to the use of hacking/cheat codes to probe the game’s inner workings, and always shy away from discussing findings made in that fashion.
I’ve encountered it all too often. So sadly, I feel that Ueda will not speak further on the matter, and his team (and former colleagues) probably have strict instruction to not divulge details without Ueda’s consent. I encountered this with the Sonic 3 stuff I was digging into, as well as anything related to any Nintendo or Square Enix game we’ve covered on the show.
Square Enix outright has a policy to decline interview requests regarding retro titles (interviews now can only be setup on the basis that it’s for a current or upcoming product). Nintendo routinely declines to comment on anything that isn’t related to a current or upcoming product, too.
With anything Team ICO, it’s hard to get access now especially after all the fuss regarding The Last Guardian. EDGE is probably one of a handful of places that could score such an interview, so that’s great they got access to Ueda. Sadly, Western developers are more open to discussing the inner workings of their games, especially about mysteries, glitches, and unused content.
Update: 12-04-16: I found many lines of code about the Worm by searching through some files on the Preview disc. Some of these files may be referring to other program code... not sure, but most seem to be about the Worm. The files are:
boss_worm
SkelFocusDef_WORM_HEAD1
SkelFocusDef_WORM_HEAD2
SkelFocusDef_WORM_MUNE4
SkelFocusDef_WORM_KUBI4
nico_calcWormGenealogicalNodeDownNext
nico_calcWormGenealogicalNodeDownNextLast
nico_restartWormGenealogicalNodeFromDemo
nico_calcWormGenealogicalNodeNextBase
nico_calcWormGenealogicalNodeTailBase
nico_restartWormGenealogicalNodeFromOtherIK
nico_calcWormGenealogicalNodeNext
nico_calcWormGenealogicalNodeHead
nico_calcWormGenealogicalNodeHeadBase
nico_calcWormGenealogicalNodeDownHead
nico_calcWormGenealogicalNodeDownTail
nico_calcWormGenealogicalNodeTail
SCRFuncResetWormCtrlParam
SCRFuncSetRotColCheckWormCtrlParam
SCRFuncResetAcceleParamWormCtrlParam
SCRFuncSetAcceleParamWormCtrlParam
SCRFuncSetSpeedByHorseForWormCtrl
SCRFuncSetDistByHorseForWormCtrl
setWormIKNodeLimit
setWormIKBanterpSec
setWormIKBoundDynamics
setFallGravCoffWormCtrlWork
setAttainSpeedWormCtrlWork
setAcceleParamWormCtrlWork
setRotColCheckWormCtrlWork
setWorldPitchLimitWormCtrlWork
setLimitTurnWormCtrlWork
setAttackParamWormCtrlWork
setMaxFallSpeedWormCtrlWork
setOffsetParamWormCtrlWork
setUnderFrictionCoffWormCtrlWork
setGroundFrictionCoffWormCtrlWork
updateWormCtrlWork
createWormCtrlWork
resetVelocityWormCtrlWork
deleteWormCtrlWork
initWormIKWork
getWormIKWork
CsvRoot_scr_wormstatus
CsvRoot_worm_movectrl
ReflectIK_initWormDynamics
If you have any thoughts about these lines of code please leave a comment below.
The Monkey
This Colossus is fought inside a cave environment that has stalactites. It can grab them and climb around the ceiling. In some depictions (from the art book images), the Colossus is able to grab them with all four limbs, others only two. The Colossus would attack by dropping on top of you from the ceiling when you walked below it (Note: This is not mentioned in the art book so I have doubts about the way it attacked Wander). All we know for sure is 'It hung from the ceiling, and you'd defeat it by dropping it to the floor'.
Speculation: We can imagine Wander entering the cave, the cut scene would play out and the Monkey would dart around the ceiling from stalactite to stalactite like a colossal Tarzan! You would wait until it was above you and just when it lets go of the stalactites you would roll away to one side to avoid it falling on you. It would crash to the cave floor and be knocked unconscious for a short time.
Once you reach its unconscious bulk, you would climb up and stab at its weak point, perhaps there was more than one? It would then awaken and throw you off and you would have to repeat the process. I think it must have been a fast colossus as it would have to catch up to Wander easily in order to fall down on him. Alternatively, it may have had a ranged attack (as #8 does) and this would knock Wander down temporarily, allowing the Monkey to fall onto Wander. We can only assume that being hit by the Monkey would injure Wander and not kill him, so he would have time to recover and escape its clutches.
Note: Could this be the colossus that lived at i3 behind the Dam? From the beta map it looks like a closed cavern with entrances on three sides, see map below.
This Colossus is fought inside a cave environment that has stalactites. It can grab them and climb around the ceiling. In some depictions (from the art book images), the Colossus is able to grab them with all four limbs, others only two. The Colossus would attack by dropping on top of you from the ceiling when you walked below it (Note: This is not mentioned in the art book so I have doubts about the way it attacked Wander). All we know for sure is 'It hung from the ceiling, and you'd defeat it by dropping it to the floor'.
Speculation: We can imagine Wander entering the cave, the cut scene would play out and the Monkey would dart around the ceiling from stalactite to stalactite like a colossal Tarzan! You would wait until it was above you and just when it lets go of the stalactites you would roll away to one side to avoid it falling on you. It would crash to the cave floor and be knocked unconscious for a short time.
Once you reach its unconscious bulk, you would climb up and stab at its weak point, perhaps there was more than one? It would then awaken and throw you off and you would have to repeat the process. I think it must have been a fast colossus as it would have to catch up to Wander easily in order to fall down on him. Alternatively, it may have had a ranged attack (as #8 does) and this would knock Wander down temporarily, allowing the Monkey to fall onto Wander. We can only assume that being hit by the Monkey would injure Wander and not kill him, so he would have time to recover and escape its clutches.
Note: Could this be the colossus that lived at i3 behind the Dam? From the beta map it looks like a closed cavern with entrances on three sides, see map below.

Map of I3 showing possible entrances to the Monkey's lair
For further proof of the Monkey being at i3, I used the co-ordinates shown on the image below. You can see the X, Y, Z values on this image from the art book which features 'A test shot of Wander holding onto the Monkey'. The co-ordinates are: X +0.22, Y -58.66 and Z +94.82. Note: From the translation, the co-ordinates refer to Agro (horse_A), so they reveal a definitive location for Agro during the Monkey battle. So I overlaid a grid onto the i3 map square and marked the position of the co-ordinates (see below), and it seems to match the cave like structure shown on the map quite well.

Monkey position co-ordinates at i3 (300m x 300m)
However, the co-ordinates fit much better when overlaid on #10's cave at B4 (almost in the centre), so perhaps the Monkey was planned to exist at B4? The problem with this is the Z value (the elevation). At i2 (the Dam) the elevation is very close to the the co-ordinates revealed in the art book image (+92.82), Dirge's cave is at an elevation of -8, way too low to be from the art book image.

Position works equally well at B4, #10's cave (apart from the elevation)

Test shot of the Monkey - translated by Glitterberri (cleaned up in Photshop)
You can see above that this colossus is huge! I mean look at how small Wander is compared to its colossal bulk. I would compare its size to that of Quadratus (#2) and Wander seems to be climbing just above its central waistline. It seems hard to imagine how Wander could survive this massive creature falling down on top of him, he would be crushed in an instant, so perhaps you only had one chance to take out this colossus? If it fell on you, you were dead and would have to start over. If only we could see more images or videos of these discarded colossi!

Cave opens to sky beyond
And look at this! It was my friend Wisi who first noticed this very hard to see detail. Behind the text at the top left corner, there is sky showing beyond the darkness of the cave. Since I have this image in layers in Photoshop I turned off all the text and HUD features and did my best to recreate what the raw image may have once looked like.
This proves that the Monkey colossus was once part of an early build of the game. The fact that you can see a small window of sky out beyond the dark confines of the cave proves this. Otherwise, if this was just a testing area for the Monkey you would expect to see a neutral background behind it (see Emon example below). The fact that you can see Wander climbing up the Monkey's body shows us that (at some early stage) the Monkey was a real colossus, albeit in an early stage of development. The debug menu reveals that the HUD we see was not a specific HUD in the game, but rather it was just a part of the debug menu, hence the rounded corners of the HUD which match the other features of the menu.

Emon T-stance test
Update (Jan 2015): Morlun91 recently made me think again about the i3 map square (you can see his comments at the bottom of this post). His idea is that i3 contains a dry lake bed instead of a cave. So instead of a 'raised' cave, what you are seeing is an 'indented' dry lake bed. Also, the features I thought to be 'skylights' in the roof of the cave don't match up with what we see in the game.

Skylights or some other feature?
The problem here is that no other colossi lair has more than one skylight, just one big central hole as you can see at #6, #10 and #8's anti-chamber, although technically this isn't a colossus lair. So if they are not skylights (holes in the cave roof) what are these features?

Only single, large skylights are seen in the game

Comparisons between D3 and i3
Above we can compare these two map squares which both lay on the 3rd row of the map. D3 is #9's lair (Basaran) and it looks very similar to i3 in my opinion. Both have those strange circular features that we know are geysers at D3, but whether there were geysers at i3 is unknown. But it's clear these features are not skylights. So it seems i3 was a flat plain and not a cave after all, what I perceived as a 'raised' cave was in fact a depression.
I once created a height map of the i3 map square using 'World machine'. You can do this in 3D Studio Max and other software packages. It uses the darker areas of the grey scale image to represent the lower areas and the lighter shades to map the higher areas of the image. But it came out looking how I had expected, with a raised cave like shape.

Height map created with World Machine

The only image we have of this enigmatic colossus
Note how the Monkey has two strange circular stone circles on its chest. From the sketch below we can see that these are some kind of weird circular stone protrusion or decorative feature, perhaps to aid Wander in his ascent?. Again, we have so little information to go on, only this one low res image (about the size of a postage stamp in the art book).

Other designs of the Monkey from the art book

Montage of what I once thought the Monkey's lair might have looked like (at i3)

Photoshop montage of the Monkey at Dirge's cave (B4)

Another Monkey Photoshop montage
Update March 2015: As i3 looks like D3 we can imagine it as a desolate flat plain, much like Basaran's lair is today, and with WWWArea's help I managed to find a texture in the game code 'sz_kame_koura_i3', which is the only texture with 'i3' as part of the label and the texture belongs to Basaran (#9). The Japanese word 'Kame' means 'Turtle' and 'Koura' means 'Shell' so effectively we have the translation of 'Turtle Shell', further cementing the evidence that i3 was a testing ground for an early Turtle colossus, which makes sense when you examine the early builds of the Turtle, it lived on a lifeless grey flat plain, very similar to D3, its final destination.

Early build of the Turtle colossus (which evolved into Basaran)
So it makes sense that when they removed the Phoenix from D3 they replaced it with the Turtle, changing its location from i3 to D3. So where does that leave the Monkey? There doesn't appear to be any map square that suits this colossus, it may have never passed the testing stage which might explain why the only two images we have of the Monkey in the art book show it on a black background.
Check out my old beta Monkey speculations here:
Monkey Size
Based on the 'Test shot' artbook image shown above, I managed to estimate the Monkey's height based on Wander in the image. It appears to be one of the larger colossi, as tall as Quadratus or Gaius with its arms extended, and just above 18m high with its arms by its side, although I doubt we would see the Monkey in this configuration as it would spend most of its time navigating the roof of the cave.

Monkey size chart
Update March 2017: A player named BH or Beegle emailed me today with a strange discovery! There appears to be a weird dark texture on the wall of Dirge's cave that has the shape of the Monkey colossus. As interesting as this find is, I did tell him that it was most likely a mirrored texture that just happens to look like a long armed, two legged, human like shape! But it got me wondering if Team Ico put this here as a tantalizing echo of what was once the lair of this discarded colossus... if indeed the Monkey was ever located in Dirge's cave in early builds. See what you think from the images below.

Beegle's screen captures of the Monkey texture - interesting!

Nomad's screen captures of the Monkey texture (Note: with no bloom effect)

Here we see one of the 'half' textures of what looks like the Monkey
I ran around the walls of Dirge's cave in the NTSC version and saw this texture over and over. There is only one place where the two texture are mirrored, which is to the left side of the cave wall once you first enter Dirge's cave...

Monkey texture from the Preview version - can't see anything special!
So it appears there is no mystery here, just a very interesting 'Monkey' shaped texture on the cave walls! But I thought it was interesting enough to include in this blog post ; )
The Griffin
The SotC wiki names this one Kyos (a fictional name), the battle was fought in a similar way to how you fight Dirge. It's a battle that focuses around riding Agro, and using him to get onto the Colossus. However, it took a while to finally get onto the Colossus, and apparently it was pretty easy to fall off. For this reason, it got frustrating and quickly tedious, as you had to keep repeating a long procedure to get back on the Colossus after falling off, that's why it was scrapped.


The area in this shot is similar to an area of the beta mountains at i7 on the map


Wall like structure at i7 matches the art book image
You can see from the illustrations below that Wander was supposed to strike the structures on its back with his sword (the same as #12 Pelagia), perhaps this changed its direction as it seems like Wander is riding the colossus. The art book says 'You could defeat it by making use if its weakness, fire'. So it seems this idea was recycled and later used with Celosia (#11) but where and how you lit the fire is not stated, but perhaps there was a brazier nearby that you could use to light a torch.


The wings are for decoration

There are no clouds above the i7 quadrant, only a section to the north, so it seems unlikely that a colossus lived here. I based my evidence about the Griffin being at i7 from the strange wall like texture on the east side of i7 as it resembled the wall we see in the art book image. But for all we know, the entire area that the Griffin occupied was removed from the game early in development, so there's no way to really know. It's just pure speculation at this point. See my i7 speculation video here:
Update (Feb 2015): With WWWArea's help I believe I have more evidence the Griffin did indeed live at i7! In fact it was WWWArea who found the evidence a long time ago but just never mentioned it ; ) When you search the hex code for the i7 models you find textures associated with the area. There were three textures linked to i7, these are labelled: lb_dry_ground, sk_sea_dammy and lb_iwahada.

i7 textures revealed in the code
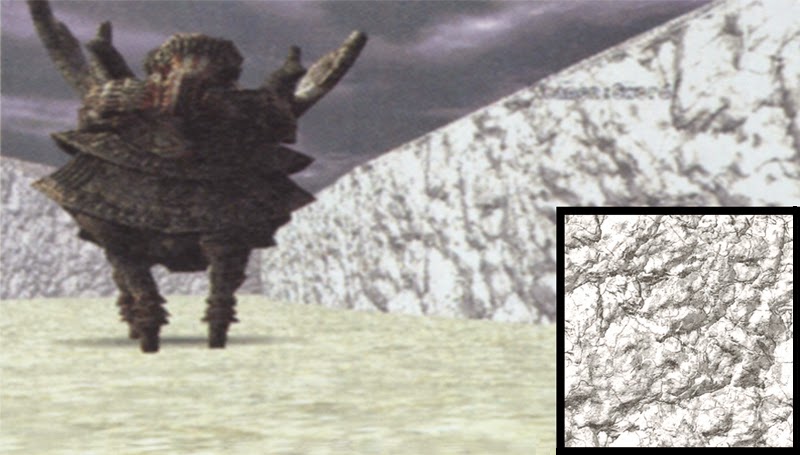
lb_iwahada texture matches the walls of the Griffin's enclosure
So this I think strengthens the argument for the Griffin at i7, of course we still don't know for sure but it's all we have to go on right now. This raises the question, how did you reach the Griffin's lair? There only seems to have been one path that would lead to it starting East from H6, then over the beach at i5, following the rocky coast around into J5 then South to J6 and J7. From J7 you move West into i7. Seems like a long circuitous route and there's no evidence this was even possible as the cliffs at J6 and J7 are much higher up than the low lying area seen at i7, so how you could even get down there is unknown.
So it seems more likely that the Griffin was also a test area, explaining why it is out at the edges of the world map. Like the Monkey, these discarded colossi seemed to be in the process of development, not yet fully conceived, but workable in the sense that they could move around in their environments being fully animated.
Update: 12-04-16: I found a few lines of code about the Griffin by searching through some files on the Preview disc. The files are:
SCRGriffinRush (does this mean the Griffin 'rushed' at Wander, i.e. charged?)
SCRGriffinRumble (perhaps the sound of its colossal footsteps?)
griffinTorchLimit (proves there was a torch nearby)
The Devil
The SotC wiki names this one Pholux (again fictional). It resembles a winged gargoyle and lived in some ruins by the edge of a cliff. It had long arms which it used to climb the stone pillars around the arena, a head with several small projections which fire plasma bolts (like those of #8, #9 and #12), and finally it sports two tiny wings which are unable to lift it off the ground, but are capable of producing strong gusts of wind (again as we see in the battle with Avion in the final release version).
The art book says 'It was an extremely small colossus.You'd defeat it by menacing it with your bow, then drawing closer while hiding in the grass and attacking from behind. I imagined the battle with the Devil to be fierce. You'd hide in the grass and jump on its back'. The primary goal of this battle was stealth and deception (re-used in the battle with Phaedra #4). The Colossus had a weak spot on it's back. You had to hide in the various patches of grass and try to attack that weak spot with your bow and arrow.


The art book says 'It was an extremely small colossus.You'd defeat it by menacing it with your bow, then drawing closer while hiding in the grass and attacking from behind. I imagined the battle with the Devil to be fierce. You'd hide in the grass and jump on its back'. The primary goal of this battle was stealth and deception (re-used in the battle with Phaedra #4). The Colossus had a weak spot on it's back. You had to hide in the various patches of grass and try to attack that weak spot with your bow and arrow.

Lived in an area surrounded by stone columns

Wander hiding behind the Devil
Above I have used Adobe Illustrator to trace the Devil, Wander and all the structures seen in the image. When you look closely you can see Wander standing in front of a column behind the Devil, in the art book it mentions that 'You'd hide in the grass and jump on its back'. This image shows this, the Devil is looking for Wander and has no idea he is behind. I think it would plod along in this way, unsure of where its enemy was.

Central columns seem to be stepped
You can see that these columns are designed for Wander to climb onto them! They appear to be set in just such a way that Wander could climb onto the first 'lowest' column, then climb up to the highest column. Remember, this is the same image, just with the Devil and Wander removed, so we can imagine Wander climbing onto the columns while the Devil is distracted, looking for Wander but not seeing him. Wander would then could jump onto the Devil's back and strike a devastating blow with his sword.

Notice these orange coloured structures? Do they look familiar?

Orange brick structures are clearly visible here
Riccardo Sonnino (Morlun91) speculated that the orange brick structures seen in these images are early versions of what we see in the game today at i2. They are shorter and less developed than what we see in the final version. This suggests that the arena was worked on further into development. When the art book images were taken it shows an earlier incarnation of the Devils arena, just three small 'postage stamp' sized images is all we have! But it seems clear that the devs continued to work on the area, which explains why the orange brick structures seen at i2 today are more developed.

Steps leading up to a platform behind the Devil
Notice how Wander looks much like he does in the final (retail) version, this tells us that it was quite late in development when they decided to remove the Devil. Ueda has stated that they were about half way through development when they decided to reduce the number of colossi, so we can speculate that at this time Wander was already fully developed.

Same image without the Devil or Wander
Here we can see that there was a temple like structure behind the Devil with two large columns on either side. There also appear to be steps leading up the the main temple platform. What this structure was used for is a mystery, but it seems clear it played an important role in the battle with the Devil.
Art book sketches of the Devil

Orange brick structures found at I2 - northwest of the Dam
Morlun91 based his theory on the image above which show those orange coloured columns. There's also a small flat stone in the image which appears to match up with what we see today at the orange bricked arch at I2, to the northwest of the Dam.

The arch

Stone steps lead to the arch

Comparison of the structures found at i2 with the Devil image
You can see in the above image how the stone steps can be seen in both images and I think they match the art book image quite well. The problem is that the orange brick columns in the Devil image have larger bricks and are much shorter than the arch we see today, but if you look closely, you can see a thin sliver of stone connecting the two columns, like a doorway, so this ties in with the arch we see in the game today.
We can guess that at this stage in development the arch bricked structure was also very different, and later was modified to its current form, but I think this is the best evidence so far as to where the Devil lived.

Map showing the extended green field leading from the Dam

The H2 quadrant was deleted leaving only part of it in i2
If you look carefully at the beta map you can see an outline leading from the northwest corner of i2 into H2 and H1, but here we have a new concern, all the other colossi exist within a single map square, never do we see their arenas spilling out into other squares... so this presents a problem. You can see above that at the west edge of i2 (where the orange brick arch is today) it's just a thin area that is chopped off at its west side where it joined with H2.

Map showing possible location of ruins
In H2 you can see a ridge of mountains to the south of the green field which would be a barrier preventing you from traveling further, so it seems the Devil lived in the Northeast corner of H2, this would be where the ruins, columns and Devil would have existed.
Note: Morlun91 and I have been in deep discussions about the cut colossi for months now with over 120 pages of email text between us! We argued back and forth about this or that until we finally settled on the above information as being as close as we can get for now (until some new evidence appears). I put all this new info into a video (in outline) here: https://www.youtube.com/watch?v=5Do_0aWpYeo
Travel Time to the Colossus
Another idea I had involved counting the number of map squares it took to reach a colossus, I could then check if any of the beta colossi would fit the current game count. The furthest you have to travel in the game today is 5 map squares to reach Dirge (#10) or Hydrus (#7). Note: this doesn't include F6 where you start out at the Shrine of Worship. So we can assume that 5 map squares is the limit as to how far Wander should travel to reach a colossus, although we have no idea if this was always the case.

One route to the Dam involves first heading to #15's desert temple then (by some means that is impossible in the final version) make your way across the gorge at the back of #15's lair (where Argus first appears) to the mountains, then you would travel East along a trail that would lead you to H2 (the Devil).This would only require travelling through 2 map squares to reach H2 and 3 to reach the Dam, however since there is no way across the gorge it seems unlikely this was a legitimate route to reach the Devil.
Of course, we have no way of knowing if the map was different in the early builds of the game... perhaps there was a bridge here leading across the mountains? But I think it unlikely. The most logical answer is the Devil's arena was only a test area and was never part of the main map, which explains why it is out on the Eastern part of the map. The red circle (in above image) indicates the Eastern most plateau of the H1 mountains but it has no collision detection, there isn't even any sound for that matter as it's way out beyond the bounds of the playable area.

Plateau at H1
Another route runs through Avion's arena, Riccardo and I discussed this at length, and this route involves 5 map squares to reach the Dam and 6 to reach H2 (the Devil's lair), so one less map square than the above route. Again it is pure speculation that it was ever even possible to travel to H2 or the Dam, they may have been designed as 'test areas' only and were not part of the main game peninsula? It's also not clear how you would have traveled through H5 (Avion's lair) to reach the Eastern lands, although earlier maps revealed in the demos and Preview version show H5 as a dry lake bed and not full of water as it is in the game today.

Path to the Dam and the Devil's arena via H5 (Avion's lair)
Another less obvious route requires a lot more travel time and was very likely never possible (or even considered), but I thought I would include it here in any case. It requires 8 map squares to reach the Dam and 9 to reach H2. From the demo/preview maps there is an obvious trail leading from H6 to i5, which from the looks of it used to be a beach type area on the shores of the vast surrounding sea. In the game today the cliffs end at H6 but in the Preview version there are some floating beta lands visible above H6 which may have been planned to be crafted into the i5 map square?

i6 beta mountains (unfinished) from the Preview version

Path through i5 then heading North to the Dam and H2
So you can see how this route would have worked, you would travel from the Shrine of Worship to H6, then follow the trail along the cliffs to the beach at i5, from there you would travel North into i4 (Note: this map square seems significant as the Malus icon appears here when you use Codebreaker codes to start a new game with all of the colossi defeated). It's not clear how you would travel from i4 to i3, but if this were possible (?) you could then continue into i3 (a flat, desolate plain like we see at D3 (#9's lair) today. Follow the path North into i2, go through the cave tunnel until you reach the Dam. This requires 8 maps squares to reach the Dam and 9 to reach H2, so it seems very unlikely that this was ever a legitimate path to the colossus.
So in the final analysis, using the number of map squares required to reach a colossus, it seems the winning route is through H5 (Avion's lair). This requires 5 map squares to reach the Dam, and 6 to reach H2 (the Devil). From the Demo/Preview maps it seems this area was once a dry lake bed with sheer cliffs surrounding it, but if you look closely at the map there does appear to be an entrance leading East (see below).

Possible path through H5 (Avion's lair) to i5 and beyond
Sound Effects Parameters
The following files were converted with a hex editor from the Pre-release version by Glitterberri, our wonderful resident translator ; ) There are extra folders on the Preview disc containing XFF files that I could never read or access, but Glitterberri converted them using EUC-JP encoding in a hex editor which allowed me to examine these extra folders for the first time! The folders are named DBGCORE, DBGMGR, GRPTOOLS, MAPTOOL, MDLTOOL, PATHTOOL and PRTTOOL. The files feature sound files for each colossus, including 6 of the 8 discarded colossi, and interestingly, the two that are missing are the Monkey and the Griffin, which Morlun91 and I had earlier speculated were only ever test versions that never made it into the game, which proves that our long collaborative efforts were proven correct (at least for two of the colossi : )
The files list the sound files associated with each colossus which describe their 'maximum volume range', 'half volume range', and 'no longer hear' range (or def). Much like with Agro, Wander has three sound files depending on how far away Agro is, he whistles when she is far away, he yells her name when she is not so far away, then speaks her name when she is close. There also appear to be three sounds files for each range type.
Phoenix
seParam[phoenix_far2].volumeMaxRange
seParam[phoenix_far2].volumeHalfRange
seParam[phoenix_far2].volumeMinRange
seParam[phoenix_far].volumeMaxRange
seParam[phoenix_far].volumeHalfRange
seParam[phoenix_far].volumeMinRange
seParam[phoenix_near].volumeMaxRange
seParam[phoenix_near].volumeHalfRange
seParam[phoenix_near].volumeMinRange
seParam[phoenix_def].volumeMaxRange
seParam[phoenix_def].volumeHalfRange
seParam[phoenix_def].volumeMinRange
Roc
seParam[roc_far2].volumeMaxRange
seParam[roc_far2].volumeHalfRange
seParam[roc_far2].volumeMinRange
seParam[roc_far].volumeMaxRange
seParam[roc_far].volumeHalfRange
seParam[roc_far].volumeMinRange
seParam[roc_near].volumeMaxRange
seParam[roc_near].volumeHalfRange
seParam[roc_near].volumeMinRange
seParam[roc_def].volumeMaxRange
seParam[roc_def].volumeHalfRange
seParam[roc_def].volumeMinRange
Sirius
seParam[sirius_far2].volumeMaxRange
seParam[sirius_far2].volumeHalfRange
seParam[sirius_far2].volumeMinRange
seParam[sirius_far].volumeMaxRange
seParam[sirius_far].volumeHalfRange
seParam[sirius_far].volumeMinRange
seParam[sirius_near].volumeMaxRange
seParam[sirius_near].volumeHalfRange
seParam[sirius_near].volumeMinRange
seParam[sirius_def].volumeMaxRange
seParam[sirius_def].volumeHalfRange
seParam[sirius_def].volumeMinRange
Spider
seParam[spider_far2].volumeMaxRange
seParam[spider_far2].volumeHalfRange
seParam[spider_far2].volumeMinRange
seParam[spider_far].volumeMaxRange
seParam[spider_far].volumeHalfRange
seParam[spider_far].volumeMinRange
seParam[spider_near].volumeMaxRange
seParam[spider_near].volumeHalfRange
seParam[spider_near].volumeMinRange
seParam[spider_def].volumeMaxRange
Worm
seParam[worm_far2].volumeMaxRange
seParam[worm_far2].volumeHalfRange
seParam[worm_far2].volumeMinRange
seParam[worm_far].volumeMaxRange
seParam[worm_far].volumeHalfRange
seParam[worm_far].volumeMinRange
seParam[worm_near].volumeMaxRange
seParam[worm_near].volumeHalfRange
seParam[worm_near].volumeMinRange
seParam[worm_def].volumeMaxRange
seParam[worm_def].volumeHalfRange
seParam[worm_def].volumeMinRange
Monkey
No sound files in the code - suggesting it never made it into the game
Griffin
No sound files in the code - suggesting it never made it into the game
Devil
seParam[devil_far2].volumeMaxRange
seParam[devil_far2].volumeHalfRange
seParam[devil_far2].volumeMinRange
seParam[devil_far].volumeMaxRange
seParam[devil_far].volumeHalfRange
seParam[devil_far].volumeMinRange
seParam[devil_near].volumeMaxRange
seParam[devil_near].volumeHalfRange
seParam[devil_near].volumeMinRange
seParam[devil_def].volumeMaxRange
seParam[devil_def].volumeHalfRange
seParam[devil_def].volumeMinRange
Yamori_A
There are also sound files for the now defunct Yarmori_A, i.e. the Gecko or Kuromori (#8). In the retail version it is referred to as Yamori_B, so Yamori_A is the earlier version of this colossus. Very interesting!
seParam[yamori_A_far2].volumeMaxRange
seParam[yamori_A_far2].volumeHalfRange
seParam[yamori_A_far2].volumeHalfRange
seParam[yamori_A_far2].volumeMinRange
seParam[yamori_A_far].volumeMaxRange
seParam[yamori_A_far].volumeHalfRange
seParam[yamori_A_far].volumeMinRange
seParam[yamori_A_near].volumeMaxRange
seParam[yamori_A_near].volumeHalfRange
seParam[yamori_A_near].volumeMinRange
seParam[yamori_A_def].volumeMaxRange
seParam[yamori_A_def].volumeHalfRange
seParam[yamori_A_def].volumeMinRange
The other 16 colossis' sound files are also listed, but strangley Malus is listed twice! Once as 'Buddha' and again as 'Evis'. So it seems Malus was the only colossus to be given two names by the developers, one for the PAL version (Buddha_A) and another name in earlier builds (Evis). Note: In the NTSC (US) version the files always list it as Evis.
Udea explained why he chose this name in the art book, 'This Colossus was called Evis. Because the game is focused on opposing a colossal force, we joked about it being anti-establishment. When you think 'anti-establishment', you think 'rock'. And the god of rock is none other than… well, that was my train of thought when I spoofed a certain musician’s name [laughs]'.
Other Early Colossi Designs
Apart from the 8 discarded colossi, the art book and the NICO dvd reveal how some of the current colossi looked in their early stage of development. For instance the so called 'Turtle Colossus' was very different to what it evolved into (Basaran #9). You can also see how Phalanx evolved from a simple snake like model with appendages into its current form.

A clinging test shot

The sky effects once differed from today's

An early shot of the humanoid colossus

A trample attack test shot

An attack motion test shot

Test shot of a colossus peaking into a building
From the above image in the art book we can see that at one time Wander hid under the temple and Valus had to crouch down to search for him, just as we see at #6's arena in the final version (with Barba). So I recreated the image to show what it might have looked like. This proves that at one time the enigmatic temple at #1's area had a purpose after all. In fact, in the game code there is reference to a 'temple event' at #1's arena, so I have speculated that it once involved Valus crouching down in front of the temple.

I recreated the image in Photoshop

'Blue vest' version showing the colossus icon

In the above image we can see Agro was part of the battle with Valus. This ties in with some box cover art which also shows Wander riding Agro. The temple in the background is also more defined, or else its textures were lighter. It seems to me that this was the version where Wander had to hide under the temple in order to scale the colossus (probably via jumping onto its hand).

Is it just me or does the temple seem to be in the wrong place here?
It's interesting to see this early version of the first colossus with Agro riding around to avoid it. What function Agro had here is not clear, for instance did you use Agro to climb onto the colossus? Perhaps an Agro launch to reach its leg or club perhaps? Remember the box cover art shows Argo used in this battle, so I'm convinced at one stage (early on) Agro was an integral part of the fight with Valus.

NICO dvd image of the first ever colossus! - which it seems Quadratus was based on

Early, crude version of Quadratus from the NICO dvd

A differently patterned model for colossus 8

An early screenshot of Gecko A

Turtle colossus evolved into Basaran (#9)

Turtle colossus shoots bolts of energy - as Basaran does today

Wander losing his balance on the back of the Turtle

Wander climbing the Turtle's tail
It seems at this early stage it was a simple matter for Wander to just jump onto the Turtle's tail and climb up along its grass like back. Presumably, you still had to stab its weak spot located on its head as we do with Basaran in the retail version. So the idea of geysers tipping the colossus over must have come later. Note: If you are very skilled, you can still climb Basaran's tail and get launched up onto its back. You can jump onto the tip of its tail easily enough, but it's the timing that counts. If Wander jumps at just the right time and the tail is lifted up it's possible to be thrown onto Basaran's back. I have never managed to do this, but from a Games F&Q forum post it seems to be possible.

Art book sketches of Celosia (#11)
In the above art book image it reads 'A sketch of a small sized colossus'. Due to a lack of density and the tricks to its defeat overlapping with the methods used on other colossi, it was cut in the end'. But from the above image it's clearly Celosia (#11), so how was this colossus cut? Was there yet a third fast moving, bull type colossus that was cut from the game? Perhaps Celosia that was cut, but as the deadline approached and time was running out they decided as the last minute to include it. This would explain why the introduction from Dormin mentions 'An altar overlooks the lake' where no lake exists?

Very early shot of Phalanx - no more than a snake like shape with appendages

Phalanx has red symbols on its wings

Another art book image of the 13th colossus


Later images of Phalanx - this version had a colossi icon in the lower left corner

An early screenshot of Colossus 16

Another early screenshot of Colossus 16

An early screenshot of Dormin
Above we see a test shot of Dormin, if you look carefully you can also see Wander to the bottom left and Emon and a couple of soldiers in the lower centre. To the lower right is a save stone. There a strange red and white striped box behind Wander and some large white squares floating in the sky above. Note: These white squares are identical to the 'null' void map squares (such as i3) that have nothing in them. When you view these textures using the 'SotC viewer' you see just a flat white square. When you actually visit these places in the game you find one of those weird white cubes in the very center of the map square. Note: There is also something else between the soldiers and the save stone - what could it be? A white tailed lizard perhaps? Note: After careful inspection it seems to be the tail of Hydrus (#7) as it dives into the lake. However, there is a glowing spot shown here, and we know that there is no weak spot on Hydrus' tail... but in this early build there may have been.
Early Build Locations
These images are from the NICO dvd and can give us a sense of what the landscape looked like in the early development of the game.

4 stone towers at South entrance to what is now #10's lair (Dirge)

Low res stone towers at B2
Above we see that a remnant of the towers still exists in the OPM and PSU demos. It was WWWArea who found these just recently, they had been there all along. I have used a code to zoom in here so you can see them more clearly although only three of the towers exist in the demos but originally it seemed there were four.

Closeup of the low res B4 tower
I later found another code which let me, for the first time, explore the map 'outside' the 9 demo map squares! This was the first time I had ever seen these areas, usually when I tried move Wander beyond the 9 central (demo) map squares the game would either crash (black screen) or the lands outside would disappear. So it was a great privilege to actually get up close to these deleted towers, even if they were only low res versions!
See video 'Mysteries in the OPM demo (update) here:


Colossal tree is alive and healthy
You can also get a nice view of the colossal tree as it once may have looked in the game. Perhaps in an earlier build it was alive and thriving instead of the spooky dead tree we see in the game today. Yamori_B has speculated that its leaves were burnt off by the Phoenix leaving the burnt husk we see today ; )
See my video of this area here:
http://www.youtube.com/watch?v=X1WY-wRQGLs (at 07:17)


Update: 24-11-13
In the latest edition of Edge magazine (issue #261), there is a new interview with Fumito Ueda by Daniel Robson. I was in contact with Daniel before the interview so I asked him to sneak in a few questions... Daniel allowed me to ask three questions which were:1) Where were the arenas of the 8 discarded colossi located on the world map?
2) What was the purpose of the Dam like structure at i2 on the world map?
3) Was it once possible to climb to the very top of the Shrine of Worship?
But Daniel only ended up asking one question and this was Ueda's reply.
On the topic of Shadow of the Colossus, where on its map had you planned to place the eight colossi that were cut from the game?
The map in the game is designed to house 16 colossi. In other words, because the placement of those 16 colossi determined the shape of the map, it would be a completely different map if we'd included all 24. The intention was to choose the 16 best colossi and focus on making those ones even better. I think we were halfway through production when we decided to reduce their number. Oh, there's certainly leftover test data and half-edited areas, but it's a bit like the Minus World in Super Mario Bros: I think it holds more romantic appeal if you don't know the specifics.
So in other words, Ueda prefers not to say much about this topic and would rather leave it up to the players to decide what the world map once looked like 'it holds more romantic appeal if you don't know the specifics'. So we may never know where the 8 discarded colossi were originally planned to be, as those areas of the map don't exist in the game anymore, or if they do we can only speculate on where they are.
Daniel also asked Ueda about the Dam (off the record) that is it didn't appear in the article, he asked how he felt about fans being so passionate that they hack the game to find stuff like that, but he simply replied, "That comes from an illegal source, so no comment". In other words it's clear Ueda doesn't like the idea of players hacking into his beloved creation... this bodes badly for any future answers to these sort of questions.
