First up, I want to apologise for taking so long to post another blog... the last one was the PSU Preview version (back in May 2018) not long after I arrived home from visiting Bluepoint Studios. Since then I have begun work on a few more but they are still in development. But this one (I hope) should make up for the lost time as it's quite extensive and is the first blog post that has embedded videos, so I hope you enjoy it 😉.
Since around June 2009 I began making videos about my discoveries in Shadow of the Colossus. At the time I was deeply invested in the subject due to the Sony Playstation 2 forums of which I was an active member. Of course, this early on there wasn't much I could do that hadn't been done before, except to Agro launch at various places around the map.
I was using the r1888 version of the PCSX2 emulator on my iMac computer (using a Windows XP partition) and had both NTSC (US) and PAL versions to work with, and as such I noticed quite a few differences between the two versions. My very earliest videos are long gone now, but they showcased my early attempts to Agro launch onto #8's temple and launching around the cliffs that line the valley at G6 (where the entrance to the 8th colossus can be found). For example, I noticed that in the PAL version Wander could launch up onto a grassy plateau but he would fall right through the same spot in the US version.


Attempting to Agro launch onto #8's temple in the PAL version (not possible)

PAL solid ledge - in the NTSC version this area has no collision
As my emulator at the time ran the game very slowly (I was getting around 8-26fps or around 13% efficiency) and I was using the 'Snagit' screen recorder (which is still available today) the videos were terrible quality and had no sound whatsoever. So although these videos are now missing, it wasn't a terrible loss to the community. I should also mention that the average resolution for most of the videos posted from 2009-2010 was around 400 x 240p!
Nearly all of the videos posted here are available on my Youtube channel in the form of my 'compilation videos', but these are grouped into their various subjects i.e. colossi, forbidden lands, Shrine of Worship etc. and are one long, continuous video (some run over an hour in length), so I wanted to break them down to show how each video built on the next, gaining me more and more experience as the years passed by. So this blog post is really a history of my experience with the game and how it shaped what I can do today 😉.
So that brings us to my first video that was recorded not long after these early attempts. After playing around with the config settings of the emulator and gaining a bit more experience, I managed to get the fps running a little faster. I posted a message on the Playstation PS2 forums on 3rd July, 2009 'Good news is I've got my PCSX2 emulator running at about 45% now, still too slow to play the game but enough speed to check out some things'. I was still recording with the screen recorder but I worked out how to record sound, although it was only through the computer's microphone, so all the ambient sounds in the background were picked up in the recording. There is a noticeable 'hiss' to a lot of my very early videos that continued for a long time, before I used a better screen recorder.
1) G6 Top of Temple Glitch 1 - Uploaded 27th July, 2009
My earliest ever video upload, only 39 seconds long - a true ancient relic! The quality is really crappy as mentioned but there is something special about this early video as it's a product of its time (at least for me). The washed out look to it and the hiss behind the game sounds brings me back to that time when I had no idea of how to hack the game or how to even make Youtube videos. It was the start of my journey, and these first few steps are very nostalgic when looking back! I was Agro launching onto #8's temple and found a spot where Wander could fall through the temple into the void below. One of my earliest discoveries!
I learnt how to do this via an even earlier (Google video) from 2006 by Baxtertimewell. Note: This was when Google videos was a free hosting service and before they barred any more uploads in 2009, so this video was uploaded there: https://youtu.be/NMaCfgEJdQY
2) G6 Top of Temple Glitch 2 - Uploaded 27th July, 2009
In part 2 I found another area where Wander can fall through the geometry into the void, in this case much closer to the edge of the temple. Note: By sheer coincidence, this void hole is what prevents Wander from making it to the top of the temple in the PS2 PAL version! Was this on purpose or just an unintended coincidence? See video here: https://youtu.be/J0Cs3OZtdfE?t=25
3) B5 Ledge - Uploaded 28th July, 2009
This video was made as an update to an even older video (November 4th, 2006) by 'Baxtertimewell' who was one of the early SotC fans that made a bunch of cool Agro launching videos! I was very inspired by Baxter's videos at the time, as he could reach some unusual off-limits areas, such as in the E5 forest and here at the B5 ledge. Watch Baxter's original video here:
Note: If these 'embedded' videos don't play, just refresh your browser and they should work!
So you can see how Baxter nearly made it to the grassy plateau, but got stuck by the invisible walls that pull Wander back towards the ground. This also happens to me in my video, but I got a lot further than Baxter.
I posted a link to this video on the 'Last Big Secret' PS2 forums at the time and ended my post with this comment 'I believe there are still many more mysteries to discover in this game and I for one will keep playing in the hope of uncovering more secrets.'
4) E5 South Side Towers - Uploaded 31st July, 2009
My next video was also a recap of an older video (now lost). I launched up onto the cliffs in the E5 forest and followed a path that led 'behind' the twin forest stone towers. As far as I know, I was the first person to get here, even though I started 4 years later than everyone else. Or at least, I was the first to make a video about this area.

Nate-The Hunter commented at the time: Those towers were almost as amazing as the Dam and here's my reason for thinking so: The Dam was found outside the borders of the game which is absolutely awesome. The towers were found inside the FL that we have searched top to bottom, inside out, looking for every single smudge on a wall. We have done that for a year and the past 200 pages! And then this comes up?! It's neat because that means there are still things to find on the mainland.

South side stone towers in the E5 forest
5) E5 Rocky Area Above Forest - Uploaded 31st July, 2009
Here I Agro launched onto the opposite North side ledge and made my way along it to reach a green sward that led up to a previously unseen rocky area. The textures of this area match those seen at the beta mountains way off in the J column! Wander gets stuck in a molasses of invisible walls, so I took the route of least resistance which led me along the edge of a texture (above a deadly void) until I finally reached a new area which I followed to the end. This turned out to be above the North entrance tunnel cave exit which leads into the E5 forest.
Note: The 'molasses' walls I mentioned are where Wander gets stuck and moves very slowly as he fights his way through. You can hear a weird machine like sound... In the PS2 forum days they were called 'Matrix walls' but I always preferred to call them 'molasses' as it's like trying to move through a thick liquid...
darkice5647 commented at the time: That's amazing! I can't believe that you're finding all this new stuff that people have overlooked for years. keep it up!!!
darkice5647 commented at the time: That's amazing! I can't believe that you're finding all this new stuff that people have overlooked for years. keep it up!!!
6) E5 Behind North Side Towers - Uploaded 31st July, 2009
Since I was blessed with the PCXS2 emulator 'save states', I could restart the game from where I left off last time. This will be a major advantage for all my future videos and discoveries. This time I headed West through more molasses until I reached a downward rocky slope. Below you can see the narrow valley path that leads from the North into the forest via a cave entrance, but as I reached the end of the slope it pulled me inexorably into the void once more! There's no way to jump when in the 'molasses mode', so if I could have jumped I might have been able to make it onto the valley path, but alas it was not to be. I posted a comment on the Playstation2 forums: I'm amazed at just how much land is up there that we were never supposed to see.
7) G1 Back Way to #15's Temple - Uploaded 31st July, 2009
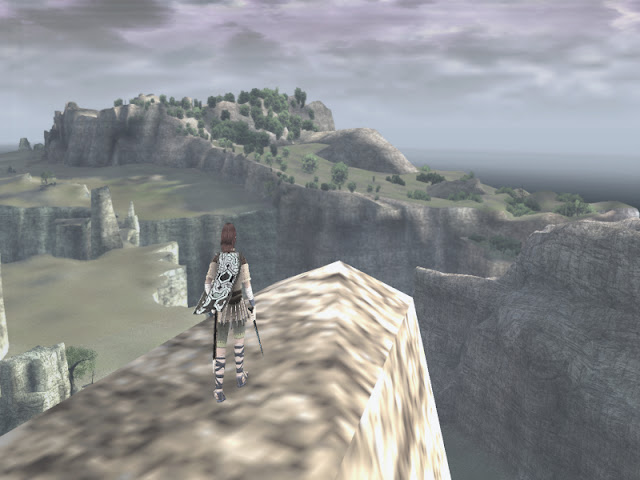
My next video took things up to a new level! I was still Agro launching, but my skills had increased so I could reach areas even Baxtertimewell had missed! Case in point the 'G1' cliffs. These cliffs snake around the North side of #15's temple to reach the front 'castle like' turrets and structures seen from a distance.

You can follow a path all the way to the front part of the castle but it's just a dead end... unfortunately. The textures flicker on and off, which lends credence to the idea that you were never meant to be here. In the PAL version you get pushed off the cliffs after the Agro launch.
I had come to realise that the NTSC (US) version was my version of choice. The PAL version had a lot of restrictions, such as invisible walls in the E5 forest and here at the G1 cliffs. There was also no rest spot on the climb to the secret garden, so from this point on, the US version was the only version I wanted to work with 😉.

Side view of the Desert Temple reached via a snaking cliff path
You can follow a path all the way to the front part of the castle but it's just a dead end... unfortunately. The textures flicker on and off, which lends credence to the idea that you were never meant to be here. In the PAL version you get pushed off the cliffs after the Agro launch.
I had come to realise that the NTSC (US) version was my version of choice. The PAL version had a lot of restrictions, such as invisible walls in the E5 forest and here at the G1 cliffs. There was also no rest spot on the climb to the secret garden, so from this point on, the US version was the only version I wanted to work with 😉.
8) E5 Way to North Side Towers - Uploaded 31st July, 2009
From the previous save state in the E5 forest I traveled East towards the North Side towers. It required a lot of jumping to get over some invisible walls, but again I reached an area no one had been to before! This was an even better discovery than the South side towers, as not even Baxter had any idea that this was even possible! I then ran West along the edge of a texture with the void just a misstep away, but found nothing but another dead end.


North side stone towers in the E5 forest
9) E5 North Side Towers Launch - Uploaded 31st July, 2009
Nothing special here, just a very short video showing how I Agro launched onto the North side cliffs in the E5 forest. The Autumnal forest is one of my favourite areas to explore in the game; I have others of course, but since this was where I started out, it holds a special place in my heart 💗.
10) E5 South Side Towers Launch - Uploaded 31st July, 2009
Same as above except from the opposite cliffs. You can reach the South side towers from here, but in this video I just run along the edge of the cliffs for a while before falling into the void (again!) This seemed to happen a lot in my early videos 😉.
11) G1 Full Route to #15's Temple - Uploaded 1st August, 2009
When I uploaded my 'Back Way to #15's temple' video above, I posted on the 'Last Big Secret' forums that: 'Unfortunately I saved over the middle part so I'll have to re-post the whole route to the temple, but really you just hug the cliff face and climb as high as you can and you will get to the temple.' So here is the updated 'full route' video. I've covered this area before in more detail in my very first 'Introduction' blog post, about how awesome it was to reach this amazing 'off-limits' area, but I have since realised that it was nothing more than a lucky chance that could be exploited in the US version. In the later PAL and PS3 versions, you slip off the cliffs very soon after the Agro launch... so you were never meant to get here in the first place. I also mentioned a little glitch at the end of the video... this was the first time that Wander strayed into an inverted conical shaped hole! Once Wander falls into this trap, he is stuck!
I'm still in my 'Agro launching' phase here, I've yet to learn anything about hacking or manipulating the codes etc. So I'm still 'pure' at this point xD. All my videos so far have been legitimate ways to reach some off-limits areas, and this one is no different.
It turns out that another SotC fan 'Khfan1' had already been here before, but I could find no evidence of a video or even an image... So I can't claim this as my discovery - not that it matters much. So again I'm running through molasses, slowly making my way to some new off-limits area and falling through the void! You can go a lot further in this area which I show in a later video.
13) D1 Hydrus Launch Area - Uploaded 1st August, 2009
Yet another short Agro launch video up to the cliffs in front of Hydrus' arena (#7th colossus). I don't get very far however, and just slide back down to the ground.
14) D2 Attempt to Reach the Towers - Uploaded 1st August, 2009
This doesn't even require Agro launching! I just tried to run up the cliffs towards the stone towers that flank the cliffs above. Turns out it's not possible, but at the time I didn't know this. I remember I got around 300 views for this video, which for me was amazing at the time!
15) C1 Mountains - Uploaded 1st August, 2009
Using another 'Baxtertimewell' video as a guide, I replicated his Agro launch to explore the C1 mountains. See Baxter's video here: https://www.youtube.com/watch?v=8oWNkJtYFPM Of course, I went a little further, exploring more of the off-limits areas than Baxter did 😉.
Yet another short Agro launch video up to the cliffs in front of Hydrus' arena (#7th colossus). I don't get very far however, and just slide back down to the ground.
This doesn't even require Agro launching! I just tried to run up the cliffs towards the stone towers that flank the cliffs above. Turns out it's not possible, but at the time I didn't know this. I remember I got around 300 views for this video, which for me was amazing at the time!
Using another 'Baxtertimewell' video as a guide, I replicated his Agro launch to explore the C1 mountains. See Baxter's video here: https://www.youtube.com/watch?v=8oWNkJtYFPM Of course, I went a little further, exploring more of the off-limits areas than Baxter did 😉.
16) D1 Closer Look at Hydrus Towers - Uploaded 6th August, 2009
This is my first ever video using the 'jump hack'! Every video before this was using legitimate Agro launches, but thanks to the help of some friends on the Playstation 2 forums I finally managed to do it. One name that has never been mentioned in the history of this subject is a user named xDarKChiPx (or as we called him 'Chip'). It was Chip who first explained (to me) how to do the jump hack on the 3rd August, 2009. However, Chip was taught by WWWArea who was in turn taught by Dark0ssx. Chip didn't hang around too long... one day I noticed he hadn't posted in a while and we never heard from him again.
It's a really short video, just a few seconds of Wander on the cliff face under the stone towers at D1, high above where you can normally reach.
17) F4 Hilarious Wander & Agro Glitch - Uploaded 6th August, 2009
Now I am starting to play around with the values and addresses in Tsearch and having a lot of fun doing so! Using Wander's position co-ordinates while riding on Agro caused some weird things to happen! In these old videos the bloom effect can be blinding at times making it hard to discern any good details.
18) D1 Hydrus Hills - Uploaded 6th August, 2009
Here I am using the jump hack again, but I failed to 'turn it off' as I reached the ground after each jump! So I continue to sail back up into the air then fall back to the ground, only to be launched up again! This was at D1 again, trying to reach those enigmatic towers! Note: At this stage I only knew how to jump up, not East, West or North South... that revelation came later 😉.


 Wander with stick on the fire column at G6
 Vast areas to explore here - in fact, I remember thinking 'Am I the first person to see this?'


19) F4 Platform Above Temple Stairs - Uploaded 6th August, 2009
Here I use the jump hack and float down with the parachute onto an upper level of the Shrine of Worship. But the results were very surprising! Wander goes into an endless roll - continually turning over and over. This was the first time I had witnessed some of Team ICO's truely off limits areas. It seems there are some places where Wander was not meant to go!
20) F5 Top of #1's Temple - Uploaded 6th August, 2009
Another 'molasses' area! Clearly you were never meant to be here. There were theories that you could get here by jumping off Valus at the right moment or catching one of the hawks that circle its head... but it's not possible. In fact you can't grab onto these hawks. In this early video I only explore the top level of the temple. Wander can run a little way past the columns but not much else.
21) F4 Secret Garden Waterfall & Platforms - Uploaded 6th August, 2009
You can see in this video my emulator is working hard to keep up with the game's frame rate. Wander starts on the waterfall above the stone blocks that lead up to the 2nd level of the garden (I used the jump hack to get there). I thought I could walk on that narrow ledge leading from the waterfall, but I just fell down. Cut to the 2nd level - as cool as the NTSC version is, it's still lacking in the garden as most of the structures up there have no collision. That is, in the OPM and PSU demos the structures above the garden have collisions. Why did the devs delete the collisions in the retail versions?
22) D2 Towers Above the Gorge - Uploaded 6th August, 2009
I had seen Pikol get up here in one of his videos and was always interested in getting there myself (as shown above in video 14), I tried to just scale the cliffs to get there but it wasn't possible... but now I had the magical 'jump hack' and the parachute so I could (technically) go anywhere I wished - so I did! I just run along the cliff edge in this video to look around... notice that ugly triangle shaped shadow Wander has? This was due to the emulator not being able to render shadows properly at this time. A lot of Pikol's videos (for example) have this same triangle shaped shadow.
23) G3 Closer Look at the Eastern Lands - Uploaded 6th August, 2009
Here I launched Wander over the deep valley that runs from G3 South to G4. I opened and closed the chute to gain as much time as I could to see any details down there, but eventually you pass a point where the 'death camera mode' kicks in, and Wander floats down to his death!
24) C2 Exploring #14's Area - Uploaded 6th August, 2009
OK, now we are getting somewhere! This I think is what you could call one of my first 'true' Nomad videos, as I have gained enough experience to make a longer, more in depth video showcasing all the structures you can see at Cenobia's arena. Note: We are still in the crappy 'screen recording' era with sounds from my computer's microphone... but this is one of the better videos from that time.
CloudStrifeVII commented: Awesome vid Nomad. Keep up the great work.
Sumoomoo commented: Great Job on all of this Nomad~! This is really satisfying my curiosity on a lot of places in the game!
25) F4 Closer Look at the Diving Board - Uploaded 6th August, 2009
Only a 15 second video of Wander floating down with the parachute to get a closer look at that weird plank like structure that juts out high above Mono's altar. It's a very strange artifact that never made any sense to me... Later on I used hacks to walk on it.
26) F4 Ledge Above Path to Secret Garden - Uploaded 6th August, 2009
This ledge always fascinated me so much! I so desperately wanted to get up there just to see what the area looked like, but there is no legitimate way to do so.

Mysterious ledge above the path to the Secret Garden
So it was very exciting when I finally made it up there. It's a really cool little secret area with a grass covered floor, a couple of trees and a huge tall stone pillar. Sadly, it's another 'molasses' area where Wander can hardly move, indicating an off-limits area.
27) H4 Hills Near Avion's Area - Uploaded 7th August, 2009
Here I tried to jump up high then land on the mountains (hills) that skirt Avion's arena to the Northeast. I open and close my chute to get out as far as I can, I was hoping to land on a walkable surface but instead it was one of the 'rolling' surfaces where Wander just tumbles. Luckily, I didn't get too far, so I landed back close enough to continue playing the game.
28) H4 On Top of Avion's Ruins - Uploaded 7th August, 2009
I launched Wander up to the top of Avion's temple. I start inside one of the four columns. Note: Wander's (up/down) co-ordinates are much lower inside the column? This will be explained later. Then I land on the higher 2nd platform, then run down the broken set of stairs. From there I jump down and grab onto the columns lining the path to the main platform. Next we see Wander on some of the higher columns that line Avion's gate.
29) F0 Closer Look at the Entrance - Uploaded 7th August, 2009
The then master 'Radical Dreamer' had already made a video like this, and later Pikol made a similar one. So I decided to try it out myself! Again, I fail to turn off the jump hack once Wander is in the air (that is you 'lock' an address in the memory editor to keep it active). Remember, these are my very first attempts at doing these things... over time I get better 😉.
30) E2 Exploring #3's Area - Uploaded 7th August, 2009
Here I jumped up on top of those two large stone rocks that serve as a roof as you ride up the winding path to the 3rd colossus (Gaius or the Knight). You can explore this area without getting stuck in any invisible walls - which was a nice surprise! Note: I described this area in my '3rd Colossus' blog post, from which Bluepoint Studios added it as one of their '79 enlightenments' locations! Pretty cool! Then I'm standing on top of the stone block you must jump to in order to reach the stone path that leads to the third colossus. But since I'm standing on top of it (via hacks), I can just jump down onto the stone path!
Darkice5647 commented: That's amazing. I can't believe that you're finding all this new stuff that people have overlooked for years. keep it up!!!
31) D6 Exploring Around Barba's Area - Uploaded 7th August, 2009
My first short exploration of the 6th Colossus arena (Barba). We start outside - Wander jumps up on top of the large standing column, but it's molasses again (what a surprise!)... then we shift inside the underground temple, up to the top - above the large central column... up here there is a very small area that Wander can explore. Funny fact: At 31 seconds you can actually hear some bird sounds in the background - but they are not from the game! They were picked up by my PC's microphone at the time of recording xD.
I commented: This is what drives me to keep exploring... finding these little out of sight places that are hidden, but still have their own beauty.
32) F8 Above #16's Gate - Uploaded 7th August, 2009
Very short video showing Wander on a higher ledge above the large stone gate that leads to the final boss (Malus). In later videos I explore this area in more detail.
33) F8 #16's Bridge Collapse without Agro - Uploaded 7th August, 2009
Of course it's not possible to cross the bridge without Agro legitimately, but I was just playing around with how it looked (from Wander's perspective) when he fell into the chasm. So I jump hacked up high then floated down onto the bridge and recorded what happened.
34) G6 Exploring #8's Arena - Uploaded 8th August, 2009
I had managed to Agro launch up onto the temple in my first videos, but now as I had the 'jump hack' I could just 'warp' up there (as I used to call it) at will.
So in this video I showcase a lot of places I could get to. I start above the rocky top of the cave entrance, then I'm on top of the temple (another one of my favourite places in the game)! Next we are walking around below the skylight, but you slide off... I land on top of one of those columns with a fire at the top, but the fire does not hurt Wander (as you were never meant to be here). Wander stands in the flame but nothing happens! Next, I'm high above the colosseum to see what it looks like from above.
35) G5 Hidden Path at #4's Area - Uploaded 8th August, 2009
As we all know by now (at Phaedra's arena) there are those weird dirt ramps that snake down that Wander can follow, but they lead nowhere? So in this video I just run down the ramps to the bottom, then run back up to the top. You can't bring Agro with you as there's a small barrier preventing the horse from passing, but even so it's a very mysterious area that fans have always wondered about. Bluepoint put a relic/coin/enlightenment down there, so at least in the PS4 version there is a reason to visit this place. I once moved Phaedra (before activation) into the pit (just for fun)...

Phaedra in the pit - makes no sense though...
36) F4 On Top of Temple Statues - Uploaded 8th August, 2009
Another short video. I start on top of the temple statues (jump hacked up there). You can stand on the curved area between the statues, but if you jump directly above a statue you will fall down 'inside' it. I do this at the very end. Note: You can see I uploaded a lot of videos in a single day, this was due to the short length and low quality of the videos. I could upload them pretty quickly to Youtube even back in 2009. I remember I got to about 600 videos before I started cleaning up my channel and deleting a lot of those that didn't have many views.
37) F4 On Top of Broken Bridge - Uploaded 8th August, 2009
Here I attempted to land on the large arched stone bridge you pass under as you head North towards the 2nd colossus... but I missed the flat area I was aiming for and slowly slid down.

Again it has those molasses invisible walls that push Wander to the edge. Well, you were never meant to get here so it's not surprising 😉.
38) G2 Outside #12's Area - Uploaded 8th August, 2009
Third time's the charm! I start on top of the 'Misty Falls' save shrine, again I am pushed off... not supposed to be here. Then I launched Wander up to a higher cliff ledge so I am above the stone column you use to shimmy around to reach the other side. I try to jump onto it twice but fail! But on the third jump I made it. You can safely stand there at least - i.e. you are not pushed off.
'Why' you may ask, did I want to get to the top of the stone column? Or to the top of any structure in fact? Well, since no one has been there before is the main reason, but another is, it provides a new perspective to view that area. I guess I just wanted to see what I could reach and what I could stand on back in these early days 😉.
39) D3 On Top of #9's Cave - Uploaded 8th August, 2009
Not much to see here... Wander sliding down through the molasses again until he falls off. In a later video I explore the roof of the cave in more detail.
40) F4 Secret Garden & Dormin's Hole - Uploaded 8th August, 2009
We start out on the overhang structure above the door to the Shrine of Worship - that is the door that opens for Wander & Agro in the opening cutscene. Pikol had already added this in one of his videos, but I just wanted to get up there myself.
Next we are in the Secret Garden and explore a few structures before ending up in Dormin's hole (as fans called it). This is the oculus that Dormin speaks through to Wander - just higher up! You can see how hard the emulator is working to render the video. In the garden the emulator always ran much slower... more polygons to render.
41) F8 Exploring #16's Area - Uploaded 9th August, 2009
We start on top of a column at the entrance to the final colossus arena. I'm fairly certain that in other versions (PAL & Preview) these columns are not solid like this. Then I explore some high ledges up above the stone gate and above Malus' arena proper. Then I check out the stone columns next to the stairs you climb to enter the arena and find they are old solid. I even jump from one to the other 😉.
These were just teaser videos back then you could say as I revisit these areas time and again.
42) F3 Teleporting Short Distances - Uploaded 11th August, 2009
So I've finally worked out how to move Wander in the four cardinal directions! Before this I could only jump up to higher places, so now (in this video) I'm experimenting with this new found ability. Poor Agro seems confused! It was dark0ssx (an early hacker of the game) who explained how to do this to me.
43) F0 Above Secret Garden Entrance - Uploaded 12th August, 2009
Here I have re-visited that enigmatic area I explored before (see video 26 above). This time I start on top of the large stone column and reveal some areas not seen in the earlier video. I end up falling down the side of the temple > rolling off a cliff > then landing hard on the surface below... alive but unscathed! Wander can survive a 16 storey fall and not die (48 metres)!
44) F5 Exploring #1's Area - Uploaded 12th August, 2009
In this video I am exploring the higher ledges surrounding the first colossus arena (Valus). I start out on the right side ledges and then explore the left side ledges. I have really fond memories of this area as before I had even learned how to Agro launch I tried to jump up higher at this area and was so frustrated that I couldn't get up there! I mean I could see these ledges from down below... so to stand on them was something I really coveted.
In fact, from ground level - if you look up it seems there was a doorway chiseled into the rock face of the cliff... but once you get up there you can see it's just a dark area... nothing special.
45) E6 #13's Ruins - Uploaded 12th August, 2009
Finally we leave behind the tinny sounding screen recorded videos! I think I changed to a different screen recorder (Camstasia Studio?) that recorded the sound file, so no more PC microphone sounds from here on out.
We are again on top of structures to test if they are walkable! I guess this was my main focus back then i.e. can I stand up there or will it push me off? In any case, the ruined structure at E6 let me (Wander) walk on all its surfaces! You can even stand on top of the stone rings.
46) D1 Hydrus Stuff - Uploaded 12th August, 2009
I try to land onto one of the tall columns that line the wall of the 7th colossus arena (before you enter). The tip of the column is a pyramid shape, so I don't think Wander could have landed there... I tried three times before I gave up. Next Wander jumps from the top of the one 'climbable' column at the back of the lake and lands on another ruined platform > jump hack > Wander falls through the Northern hills into the void below. This area will be explored more in later videos.
47) F8 16th Area Without Storm - Uploaded 12th August, 2009
I managed to 'warp' Wander to #16's arena without triggering the storm. So Wander can run around and explore the area in normal daylight - a first at the time! I run up to the platform then run back to the stairs - where the storm triggers! You can see White Agro on the other side of the bridge. I jump down onto the bridge > it starts to break apart > I run South > then the cutscene of Agro & Wander starts.
48) F8 High Ledge Above #16's Area - Uploaded 12th August, 2009
A failed attempt to reach a specific location... I was trying to get to the small ledge with a tree high above the F8 save shrine... but the molasses walls pushed me off prematurely! I get there shortly 😉.
49) G6 Ledges Around #8's Area - Uploaded 12th August, 2009
The frame rate in this video is very bad... but there are some amazing areas to explore on these cliffs! Some can be Agro launched to (in the US version), others I had to jump hack up to. They snake along the cliffs, some covered in that lime green grass that is unique to this game. I remember spending hours running around these high ledges - such fond memories!
50) F8 Hidden Ledge - Uploaded 13th August, 2009
As mentioned above in video 48, this time I jump down from the high ledge and land on the small ledge that overlooks the save shrine. There's a small solitary tree here and the ledge is covered in vegetation, perhaps it's supposed to be moss? But it's one of those ledges that pushes Wander back so in order to get off you have to keep running and pointing your controller to the edge and eventually Wander will be released and fall back to the ground.
But I've always loved these small out of the way places that exist in various parts of the map. There's a ton of them around the shell of the Shrine of Worship for instance. The video ends quite suddenly so I took a nice new screen capture that shows the ledge in more detail.

Off limits hidden ledge at #16's arena
51) F8 Making a Storm - Uploaded 13th August, 2009
I think I reloaded my save state from an earlier video where I 'warped' Wander from Valus (1st boss) to Malus (final boss). There is no storm as I 'warped' past it. So Wander lands at Malus' arena in daylight (see video 47 above) then I just move Wander onto the stairs to trigger the storm.
52) F8 Hidden Grove at #16's Area - Uploaded 13th August, 2009
This small grove of trees is only solid and walkable in the US version. In the PAL/Preview/PSU Preview and E3 Demo versions (all full versions) they do not have collision detection here. Why is the US version special in this location? I revisit this area in later videos.
53) F8 Storm Follows Wander - Uploaded 13th August, 2009
This was the first time I discovered that once you left Malus' arena and continued running North, that the storm will follow Wander (to a point). This only works in the US version btw. Also, you have to hack (mod) your way across the bridge to the other side for this to work. Agro is gone in this scenario, but Wander can still keep running North until you see the storm abruptly stops! The sky above has no clouds anymore and is replaced by a jade green colour... although in this video (due to the bloom effect) the sky appears white.
54) G2 Deadly Cliffs Outside #12's Area - Uploaded 13th August, 2009
Was testing whether you could land on the cliffs on the far side of the deep gorge at G2 that run South from #12's arena. Turns out you can't as Wander dies as soon as he lands.
55) G2 Above #12's Entrance - Uploaded 13th August, 2009
A member of the Playstation 2 forums (TresDias) asked me to make this video to see if there was any way to land on the huge arched bridge structure at the entrance to #12's arena. Turns out the top of the arches don't even have any kind of roof or top and Wander falls right through them. Would have been cool if you could have run around up there!
TresDias replied: Nomad, thanks for the video! Great effort, even if there is nothing up there to land on. I know it really didn't yield much, but still, seeing that is amazing to me. That particular area was always one of the most captivating for me. I think I always felt like if there were something special to be found in a colossi domain, it would be that one. Not sure what it is about that place, but it feels magical.

However, I can stand up there using the 'standing hack'
56) F8 Teleporting to #16's Area - Uploaded 13th August, 2009
Must apologise for the terrible frame rate in these videos... sadly they didn't get better for a long time. Luckily nearly all of these early videos are very short. In this one I teleport Wander from the main temple directly South to #16's arena (Malus). I end up landing on that little ledge I reached in video 50 above. I do this again but this time I land in the arena itself bypassing the storm, so it's still daylight here. Then I teleport North beyond the stone gates with the storm still surrounding Wander.
57) F1 Celosia's Chamber - Uploaded 13th August, 2009
Exploring the room that Celosia starts in, but the colossus is not here in this video. Next I run around along the ledge exploring, before finally jumping back down. 'Radical Dreamer' was the first to do this.
58) H4 Teleporting to #5's Area - Uploaded 13th August, 2009
I start out on the main stone bridge with the intention to warp East to H4, however there is a little surprise here! Wander jumps... and then lands back on the bridge? I was wondering what I did here as I hadn't watched this video in years, then you see the East side of the Entrance temple load and quickly after, the West side. So I had first warped Wander North, straight up the line of the stone bridge to land just in front of the Entrance temple - pretty cool! Seems I had no mastered warping Wander to specific locations on the map. The video cuts and we are back where we started. This time I do warp Wander East to H4 and after a short time we see him fall into the lake with a splash!
59) F8 Malus Attacks (part 1) - Uploaded 14th August, 2009
First I jump up really high then float down onto Malus from behind. I guess I was just showing something different here i.e. a new way to reach the top of the colossus 😉. Next, as I'm trying to reach the hidden grove of trees, Malus' bolts of energy are shooting at Wander! You can see them fly off into the far distance - pretty cool! As Wander makes contact with a ledge he is unceremoniously blown off and falls to his death!
60) F8 Agro Under Fire! - Uploaded 14th August, 2009
An addition to the above video. This time I 'warped' Agro and Wander from the Shrine of Worship to F8 (it's daylight again) then run to the trigger point where the storm starts and Malus is activated. Note: trying to replicate these things has been a challenge for me - there were some videos I made and some techniques I used back then that I cannot reproduce today!
Next I ride Agro towards Malus. The first time was a failure, but I succeed the second time around and make it to the lower platform (where in the game you reach the stairs under the colossus). At the end Agro is looking up - like she is interested in where she is maybe? But I calm her down by petting her 😉.
61) F8/H4 Agro Adventures - Uploaded 15th August, 2009
An addition to the above video. Here I am riding Agro through the stone tunnels that exist under the ground at the final boss arena. Then I warp Wander and Agro from the Shrine of Worship to Avion's arena, and fall into the lake. Wander rises up to the surface, but Agro sinks down to the lake bottom and runs around - impervious to being under water!
62) F8 Even Higher Ledge at #16's area - Uploaded 15th August, 2009
I start on the highest ledge I could find above the path beyond the main gate. That is, on the cliffs past the stone gates that lead to the stairs - that lead to the bridge that collapses. Next we see Wander standing in the circle (oculus) that you use to open the stone gates using the ancient sword.
63) F8 Malus Attacks (part 2) - Uploaded 15th August, 2009
I jump up to the column above the stairs > Malus shoots me off! I do it again with the same results! Then I showcase a really cool hack. From the stairs under the colossus, I jump hack right up onto its head! A real time saver for sure.
64) F8 #16's Gate Disappears - Uploaded 15th August, 2009
I ride Agro towards the huge stone gates at the entrance to Malus' arena, it looks like Agro is going to slam right into them - but then... she rides right through the gates and they disappear! After Wander has opened the stone gates with the ancient sword I then use the 'animations' of the doors opening to shut the gates (the animation loops over and over). But these gates are just ghosts and not solid... so Agro (or Wander) can run through them.
65) G6 Agro in #8's Area - Uploaded 15th August, 2009
Another TresDias request, this time he asked me to take Agro to the Gecko's arena (Kuromori). You can see how the emulator was 'straining' to play the game at the time... I ride Argo around the circular levels of the colosseum falling down to a lower level in the process. Note: I made this video once the Gecko colossus was already defeated, so not as interesting. Also, Agro doesn't fit when trying to go up or down the stairs. There's not much I could do with Agro here.
66) G1 Agro in #15's Area - Uploaded 15th August, 2009
I ride Agro up the large staircase where you reach an impasse, Agro can't get past the break in the stairs here. In the next scene I'm riding down the long corridor like arena to the edge of the cliff where Argus awaits. I reach the trigger point... you see Argus for a second suspended in the air (seems the arena model unloaded here).
Then all of a sudden the video cuts to a new scene of Wander warping down under the floor and falling into the cave that exists below where Argus starts hanging to the cliff wall? Not sure what I was thinking here, and why I never showed more of Agro in the arena with Argus?
67) F4 Mini Bridge Waterfall - Uploaded 17th August, 2009
Here I'm exploring the culvert / waterfall that acts as an outlet for the lake at F3 (2nd boss area). Instead of jumping down to it I start in the lake then warp Wander South to the culvert. For some reason there's no sound in this video except at the very beginning.
68) F3 Quadratus Cave - Uploaded 17th August, 2009
We start with Wander floating down under Quadratus before it has been triggered. It exists behind the cave it breaks out of when activated - frozen like a statue. You can see the underside of its glowing feet as Wander floats down then dies on the death floor! Next I warp Wander down into the cave which activates the colossus, triggering it in a new way.
69) F3 On #2's Bridge - Uploaded 17th August, 2009
Wander starts high up on one of the horizontal spans of the bridge that cross the lake and beach at F3. You can get to these legitimately in the NTSC version if you have the parachute (shown in a later video). Here I had jump hacked up there (of course)! I walk around for a while then jump back down to the beach where we see the defeated colossi pile of debris.
70) F8 Valus Shadow Follows Wander - Uploaded 17th August, 2009
This was a very bizarre glitch! I was the first to show this weird anomaly - in fact I'm the only person to ever show it, so in that sense it's a unique find in the history of the game 😉. I wanted to see if I could outrun the black tentacles (streamers) that pour out of a colossus as it is dying, so I chose the first colossus (Valus) to test it. I warped (jump hacked) Wander South to F8 (Malus' arena) and indeed it worked! I outran the black tentacles!
Once there I noticed when the camera is directly behind Wander an ugly black shadow appeared. It was the shape of the fallen colossus (Valus), you can even make out its club in the shape. So this ghostly shadow follows Wander wherever he goes now! Next, Wander is frozen... this is because the game crashed on my way back to Valus.
71) C2 Agro in #14's Area - Uploaded 18th August, 2009
This was my first attempt at taking Agro to the 'hidden city'. I did this without the colossus being there - that is it wasn't Cenobia's turn... I played it safe the first time 'round! So Agro and Wander ride around some parts of the arena, but not much else happens here.
72) F8/G2 Teleporting to Deep Areas - Uploaded 18th August, 2009
Based on a video by Dark0ssX: See his video here 'low ground will KILL you':
I basically did the same thing but at F8 (in the deep gorge where the bridge collapses and Agro falls)... you see Wander float down with the parachute, but hits the death floor, high up above the actual level of the ground. This is how the retail versions work - there is an 'invisible death floor' higher up above the actual level of the ground down below. In later videos I had to 'warp' below this.
Next, I warp Wander to G3... float down the floor of the canyon and die!
73) G5 On Phaedra - Uploaded 19th August, 2009
In the NTSC version Phaedra is fully solid and walkable before activation (i.e. before the colossus is triggered). In no other version does this occur. This reinforces what I said before - the NTSC version is the best version! So in this video I climb up the colossus before it is triggered.
74) H4 A Closer Look at Avion - Uploaded 19th August, 2009
Here I am floating down with the parachute after a high 'jump hack'. I had to open and close the chute many times to get close enough to Avion, then fall past it down into the lake below. So you only see a few seconds of the colossus. Actually, I think I was trying to land on Avion here but missed... so I changed the video title to compensate 😉.
75) E2 A Closer Look at Gaius - Uploaded 19th August, 2009
Only 36 seconds! All I did was jump hack up high then land near the colossus a couple of times. At the time I had no way to edit videos in the way I can do today, that is 'import' one or more videos into an editing program, then render the result as a new video. I could only upload one video at a time.
76) E2 Jump to #3's Platform - Uploaded 19th August, 2009
This video is confusing at first. I think I started with Wander sitting on Agro at D2, then I warped Agro & Wander to the steps of #3's platform. If you try to ride Agro up there before the cutscene starts it will send you back to the edge of the lake! Pretty cool! However, once the Knight is active and walking around you can take Agro up there (of course there is no reason to do so apart from the novelty 😉.
77) D6 Agro in Barba's Area - Uploaded 19th August, 2009
Again, I must apologise for the poor quality of these videos. This one in particular is very choppy! I start by bringing Agro down into the underground tunnel that leads to the 6th colossus arena and ride her to the trigger point. Next, Wander is down under Barba before it has been triggered in that large room Barba steps out of. I jump up and try to land on the colossus but fall through (no collisions). I then run out of the room and trigger Barba.
Next we jump to the opposite end of the level where Wander hides behind the stone columns, but this time Agro is here! The video cuts to Wander riding Agro past Barba's huge fist, narrowly avoiding being hit - Wander takes some damage though. Cut to Wander on Agro in the large room Barba starts in. So in this video I was just showcasing Agro in an area she is never meant to be ; )
78) E2 Teleporting to #3's Platform - Uploaded 20th August, 2009
Here we can see I have mastered 'warping' Wander or Agro to a specific location on the map (X,Y,Z co-ordinates). I start at D2 (Stone Arch Gorge) then 'warp' Agro and Wander to the centre of the stone disc on Gaius' platform and land right on target! Then Wander rides Agro off the ledge and falls into the lake. Wander swims safely to the surface, but what about Agro! Will the horse drown down there under the lake? No, Agro is immune to water and will happily run around on the lake bottom ; )
79) C2 Agro on #14's Island - Uploaded 20th August, 2009
I wonder why I uploaded such short videos at the time? I mean this one is just 13 seconds long! Agro is on that little island in the lake you pass by on the way to the 14th boss (Cenobia) - 'the Hidden City'. This little island is sunlit so you have another chance to check your bearings with the ancient sword. Not much else happens until I ride Agro towards the tunnel leading the arena.
80) G6 Kuromori Before Activation - Uploaded 21st August, 2009
I 'warp' Wander from the G6 lake at the front of the ruined temple to the colosseum (where the Gecko lives). But since I bypassed the intermediate temple, that is the temple where you climb the columns with the fires on top... when I reach the colosseum, Wander just falls through the floor.
So, in the next part I have bypassed the Gecko trigger point and then taken Wander down to the floor of the colosseum. Here we see the Gecko frozen before activation. The only part of the lizard that is solid is the tail section, the rest is a ghost. You can see the Gecko in its starting position with its left front leg raised up above the ground. Then Wander runs up to the trigger point to activate the colossus.
81) G1 South Side Turret - Uploaded 21st August, 2009
In this video I explore the South side front of the Desert Temple (as I call it), or the #15's boss (Argus) temple. I jump hack up way above the South side castle turret, then float down, but you can see the textures (surfaces) blinking on and off.
82) G1 North Side Turret - Uploaded 22nd August, 2009
Hmmm, I don't seem to explore much in this video... I definitely don't explore the North side turret? All I do is run around on the opposite side of the arched central bridge that spans the entrance to the #15th boss arena? Who knows what I was thinking back then xD. At least the video quality is a little better.
83) F1/G6 Celosia's Stick - Uploaded 22nd August, 2009
Here I start at F1 (#11th boss - Celosia) and get the wooden stick. If you take the stick and then leave the arena (while still holding the stick in your hand) you can travel to any part of the forbidden lands. So in this video I took the stick all the way South to G6 (#8th boss - Kuromori) then jump hacked onto the top of the columns that are lit by fire! This fire is the only other place in the forbidden lands where there is fire.

The theory was you could light the stick at G6, miles away from the #11th boss arena. But there was a problem... There's no way to legitimately get to the top of the G6 fire columns! You can climb the ledges up to a point, but you can't jump up to the top. You can only get up there via hacking. Also, what would be the point of lighting the stick at G6? I mean there is no way it would make any difference to the game? Just another wild theory at the time ; )
84) G5 Cliffs Above #4's Area - Uploaded 23rd August, 2009
This area is almost as exciting to explore as the cliffs above the E5 forest, but not quite as there are so many void holes and a tonne of those damn molasses areas! But I remember having a lot of fun exploring up on these high cliffs. The area is vast, and in this video I only cover a small part of it. In a later video I travel all the way around the perimeter of the cliffs and showcase all there is to see.
85) B4 On Top of #10's Cave - Uploaded 23rd August, 2009
I remember I really enjoyed exploring up here! This is just above the North side cave entrance next to the Lair to the West save shrine. There's not a lot to see up here, just a large area of rock punctuated with those flat 2D plants here and there. I explore this area further in future videos.
86) C2 Mountains - Uploaded 26th August, 2009
At this point in my explorations of the game I was jumping up to any high cliff or ledge to see what was walkable and what was not. In this video I'm running around on the cliffs right next to #14's area (Cenobia). You might ask 'Why do this at all'? I mean who cares what's up on some cliff you are never meant to see? There are hundreds of other games with huge landscapes to explore but you don't see players hacking their way up to some empty plateau or mountain...
I guess it's just the uniqueness of this game. It's somehow different to other games and (for me) I couldn't stop exploring it. I have hacked other games like 'Skyrim Elder Scrolls 5' and 'Journey' and found some really cool areas there, but it's not the same. It doesn't entice me like SotC does... I guess I don't have a good answer for this question - it's just the feeling I get from this amazing game ; )
87) C6 Exploring Southern Cliffs - Uploaded 26th August, 2009
Wander running around the Southern cliffs at C6. This area just goes on and on! So much land to explore! At least the frame rate has improved (slightly). Note: No other hacker had been here before - they didn't care about such places (Radical Dreamer, Pikol & WWWArea). So I was the first to show these 'off-limits' lands. Again, there's nothing there but vast expanses of rock texture and bushes... but for me it was a pleasure to explore these regions for the first time ; )
88) Cliffs Above B5 Ledge - Uploaded 26th August, 2009
In these 'off limits' lands, Wander can easily run up near vertical walls and there are no annoying 'molasses' surfaces to deal with. I guess this high up the devs didn't care about what surface attributes the model had. So here I run around and explore the East mountains and plateaus next to the South side of Dirge's cave (on the cliffs above the waterfall). There's a lot of cool stuff to see up here and the vistas are great! There's quite a few of these types of videos to follow and although they may seem a little boring to watch, actually playing in these areas was amazing!
89) Vast Area on C6 Cliffs - Uploaded 26th August, 2009
One of my longer videos from this time (over 5 minutes)! I start at C6 then jump hack Wander up onto the cliffs. Here he can run East until he reaches the top level cliffs. Then Wander can run South all the way to the South edge of C6/D6. There are vast areas here that Wander can explore - it goes on and on! I remember at the time thinking 'where does this end!?'
Not many users 'got' what I was doing here, that is they didn't see the significance of these videos... but my friend TresDias got it. He posted this message: 'I've just now gotten to see all your new videos, those are some of the best exploration videos ever. I never stop being amazed by how much solid, walkable stuff there is that we just couldn't reach normally. Stuff I tried every way I could think of to reach, but just couldn't. C6 was especially impressive by just how much there was up there!

90) B5 Rocky Area behind Large Tree - Uploaded 26th August, 2009
Exploring the cliffs behind the colossal tree that is perched above the South entrance of Dirge's cave (#10th boss) near the 'Lair on the Mesa' save shrine. There is a large area to explore up here. First I run West along the cliffs then head South as far as I can go. Then I run up to the top of the highest point then down to the base of the tree. From memory, in other versions the tree and this area have no collision detection.
91) B5 Large Tree Above #10's Area - Uploaded 26th August, 2009
Since I was already there, it seems I took the next step and made a video about exploring the colossal tree as well ; ) I run around the base of the tree until I'm in front of it. Here you can see under the tree which reminded me of a room with wooden branch walls! I jump down to the lower level where Wander can move to the edge of the cliff looking down at the 'Lair on the Mesa' save shrine. I think I wanted to jump down from there and grab onto the save shrine, but I didn't make it...
Next we are higher up in the colossal tree. It's interesting that Wander's footfalls have their own unique 'wooden' sound here. If you jump up and down at the base of a fruit tree you will hear these sounds (as they are applied to wooden structures in the game). You will also hear these sounds when you reach the wooden planks at the 1st colossus - on the climb up. I climb some huge branches but end up falling.
92) B5 Detour to ICO Beach - Uploaded 26th August, 2009
Now I'm at the Southern cliffs of B5. You can get to this area legitimately in the US version by using 'flash arrows' but in no other versions. Again the US version is the best! Baxtertimewell made a video about this area back in 2006 (now lost forever), but I recall it was called 'I shouldn't be here'... or something similar. But it was a short video of Wander running over these cliffs (years before I had even started)! In any case, in this video Wander is exploring this vast area of land. I cut the video in places as it would have taken 15-20 minutes to show all of it.
But we see Wander standing on the cliffs above the 'Western Cape' save shrine. From there he jumps down to the ICO beach using the parachute to safely fall. Without the chute, there is no hope!
93) Back of E5 Forest - Uploaded 27th August, 2009
It seems I missed my favourite area - the E5 forest. So I'm back here again ; ) In this video I run up a tall hill that overlooks the hidden valley! That is the valley that has shallow water and is surrounded by high cliff walls. Wander looks out over the hidden valley then runs back down the hill until he reaches a narrow ledge above the surface of the forest. These secret places are my most memorable and beloved areas of the game! The 'nostalgia' here (for me) is off the charts! Nostalgia can be a very subtle feeling or an intense emotional flashback - depending on the player and his or her memories.
94) Hidden Pools of Water at E5 - Uploaded 27th August, 2009
Ah! So now we come to one of my most nostalgic discoveries! I have vivid memories of getting here for the first time! I jumped up to the Southern cliffs of E5 and found these amazing pools of water, or ponds if you will. You can kind of see them from the bridge leading from E5 to E6, but unless you are paying attention they are just background noise. I was the first to explore them up close and personal ; ) In fact, I pretty much explore the whole plateau... lots of smooth rock surfaces up here. In the NTSC version you can Agro launch up here legitimately, but not in the PAL version.
TresDias commented: Holy hell, that's new to me Nomad. Great find! I'm calling it: We're naming those 'Nomad's Puddles'. Shelved alongside Pikol's Dam, Khfan1's Plateau, Kegan's Rock and Nate's Fishy Pond! Can't wait for the next video!

Ponds at E5 from the bridge
95) E5 to F7 Journey Across Mountains - Uploaded 27th August, 2009
Another video of Wander running over seemingly endless barren rock! As I said earlier, it's really fun to play but not so much to watch ; ) I start out above the South side cliffs above the E5 hidden valley then proceed to run South for miles and miles! The bloom effect is blinding here, in some parts it's hard to make out any good details... At this time I didn't think to bring up the world map to see where I was and also to check how Wander was progressing along his journey.
About two thirds of the way through the video, there are edits as Wander runs into void pits or invisible walls or molasses areas... so it's not possible to make this journey in one run.
96) E5 Mountains - Uploaded 27th August, 2009
Here we are further West from the pools of water shown above (video 94) on the cliffs above the cave Wander rides through to reach the South lands from the E5 forest. Wander runs around trying to find a path to the top of the cave but doesn't quite make it this time around. Then I head North and explore the cliffs above a path that lead out of the garden, falling into void pits on the way ; )
97) E5-D5 Mountains - Uploaded 29th August, 2009
Another huge area to explore! I start at the back of the E5 forest then run all the way West to the water channel that leads to the ICO beach. There are void pits along the journey (thank you save states : ), however it is possible to make the entire run in one go. At 4:18 I pan in on what looks like some letters carved into the rock! You can see what looks like a lowercase L and an uppercase A... maybe 'Liam'? Of course these are just random textures that mean nothing ; ) At the end of the video I journey a little further inland but are defeated by more of those weird 'rolling' textures.
98) E5 Pools of Water (Reprise) - Uploaded 2nd September, 2009
We have finally moved into September! So that's 87 videos I uploaded in August of 2009 (Damn I was obsessed!) As noted above the 'Pools of Water' area was one of my favourite places, so here I have revisited the area but this time from the cliffs to the West.
In most of these early videos, I recorded my first attempts after finding a new area to explore... that is, I was 'recording' as I explored a new area for the first time. So I had no idea where to go or how to get there, I was just randomly exploring and trying this route or that. So you will see in some of these videos how Wander will run onto a slope that pushes him down or a surface he can't run up etc. But in this video I had been there before, so I know which paths to take to reach the pools of water. At the end of the video Wander stands in one of the pools - just ankle deep... but this is the only pool he can stand in, all the others are void traps! However, I still fall into a void pit at the edge of the pond ; )
99) E2 #3's Tablelands - Uploaded 2nd September, 2009
Very short video of Wander floating down with the parachute to see if the lands surrounding the 3rd colossus arena had any collision detection. I called them the 'tablelands' as they are huge flat plateaus dotted with some vegetation at the edges... News flash! They don't xD. Later I took Wander there and used some codes to explore this area in a limited way.
100) B5 Mountains Trek - South - Uploaded 2nd September, 2009
Here I am again on top of the D5 cliffs (South). I start next to the colossal tree, then head West, then South (as I did in video 90). However this time I have used codes to move Wander 'beyond' those areas he can't reach legitimately. So this video cuts to a new scene where Wander is in a different place all of a sudden! At this point I am really mastering the game the way I want it! I'm now confident in how I can control Wander and put him in almost every area within the game map.
Wander explores another huge area of the map that was previously unexplored, like I said earlier, Baxtertimewell had been here before but his video is lost forever (see video 92). But he never went into such detail as I did in this video. I go way beyond his short exploration...
101) B3-B4 Mountain Trek - Uploaded 2nd September, 2009
Video starts with Wander's position on the map - a first! Sadly, I don't use the map again... and this video runs for nearly 8 minutes. For the first four minutes Wander struggles through endless 'molasses' areas on his way South to Dirge's cave (10th boss). Every time Wander runs or jumps into a crevice or a lower area I got stuck... so the video cuts to the next walkable part. Some areas were walkable, but the majority were not.
At around 4:19 I reach the cliffs North of Dirge's arena, I then explore the top of Dirge's arena in much more detail than before (see video 85). In fact, I pretty much cover every surface worth looking at.
102) F1 Glimpses of Celosia - Uploaded 5th September, 2009
Two days have passed since my last upload! Seems I was taking a break (maybe)? But I start out at the temple - where you start the game. Then I 'warp' Wander and Agro all the way to F1 and bring up the map to 'see' where I have moved! Seems I'm using the world map more now to showcase where I am in the game - which is good. Also, my co-ordinates are spot on again! I end up on a stone ledge just above the 11th boss arena! Wander jumps down with the chute.
The video cuts to Wander standing on the high ledge where the 11th boss (Celosia) begins. There is nothing in the large room where the colossus starts > Wander jumps down to the 'trigger point', then is warped up again... you see the colossus flicker on and off, over and over.
103) B5 #10's Towers - Uploaded 5th September, 2009
I explore each of the four rock promontories at the #10th boss arena (Dirge). It's clear that I did this without the boss being active, that is I recorded this video out of turn. I jump up to each rock pillar to see what is there... one by one.
104) Back of G2 Forest - Uploaded 8th September, 2009
I start out on top of the large moss covered rock in the centre of the forest (sadly mired in molasses). I then warp Agro & Wander to the other side of the G2 forest... Pikol had shown this area briefly, but I explored it a lot more. I ride Agro around the entire area, riding to each corner of the arena. The floor collisions don't match the ground textures so you see under the forest a lot of the time. You can even see beyond the forest to the low res mountain texture and bridge in the background.
Next Wander is on foot and you can see the 12th boss (Pelagia) before activation from the G2 forest! I posted this video on the Playstation 2 forums and wrote "Also checked out the very back of the other forest at G2, right next to no. #12's area. I look to the east... I see something!" We also get to see just how close the Entrance temple and cliffs to the North are from this vantage point.
105) B5 Mountain Trek North (Part 1) - Uploaded 8th September, 2009
I start on the path that leads out of the B5 mountains towards the ICO beach. I then do a very high 'jump hack' and land on a grassy plateau banked by low profile rocks at the edge. It's quite a large area of grass hidden away up here! Note: It is possible to 'hawk hump' to this area in all versions. There are some epic views of the landscape from this vantage point and convenient rock ledges that jut out like they were made for Wander to stand on and take in the view ; )

An enormous grassy plain leads up to a rocky area

Majestic B5 waterfall can be seen here
There are four levels to this area, and as mentioned before Wander can run up near vertical walls with ease. Above the grassy plain is a barren rocky plain and this does have invisible molasses... so I run up to the next level that includes a lot of vegetation and leads to the edge of the high cliffs above the majestic B5 waterfall. Next Wander is looking South to C6 but sadly the bloom lighting is a little overwhelming here... lastly, I run up to the highest level and again head to the cliff's edge. Here Wander is on the highest ledges above the waterfall with amazing views of the landscape! Still amazes me that they could pull this off in 2005!
106) B5 Mountain Trek North (Part 2) - Uploaded 8th September, 2009
Here I start out above the cliffs of the waterfall and look down to see it briefly. I then revisit an area from video 88... and next I fall off a ledge and land 'behind' the waterfall! There's a little cave-like area here (cool little secret area). I then explore some more ledges until around 4 minutes in I find a new area that I had never seen before! This area you can't 'hawk hump' to, so I had to use the jump hack to get up there.
It always fascinated me why the devs left these huge and explorable off limits areas scattered around the forbidden lands like this. I mean this huge area is East of Dirge's cave arena in B5.

Epic views from the B5 mountains


Vast areas to explore that are not accessible (without hacking)
I posted about this video on the PS2 forums: 'I think it will be my longest video post to date. There is so much area up there to explore... I might have to break it up into two parts'! Turns out it was three ; )
107) B5 Mountain Trek North (Part 3) - Uploaded 8th September, 2009
The last part of this series I used to explore around the new inaccessible area I found in the previous video. It features Wander running around the smooth rock surfaces until he reaches an area where there is an obvious gap in the geometry. You can see great voids behind cliff walls from this area and it's possible to reach the very eastern edge of the B5 map square. At the end of the video I pan in on a rock surface as I could make out a 'Kingly looking face' there at the time... but I don't see it when I look at it today? Must have been a brief instance of pareidolia I guess?
108) B6 Riding Agro Underwater - Uploaded 9th September, 2009
So I have left B5 and moved into C5 to the so called 'ICO beach'. You can swim underwater here and almost make it to a new area (C6)... however, once you pass the boundary Wander falls into the void and dies! At 43 seconds you can see how Wander reaches an invisible wall, as the camera hits this and pans right up to Wander's face. So this is the boundary of C5... beyond this is void.
So next I ride Agro into the water in the hopes I can pass the boundary. I move way into the B6 map square! At 3:47 in the video I 'warp' Agro & Wander beyond the boundaries in the hopes of finding some solid land, but fail... both Wander & Agro fall into the void.
109) D6 Barba's Door - Uploaded 9th November, 2009
In this video I try to ascertain if there are any collisions next to the mysterious doorway we see high up on the temple at the back of Barba's arena. From a distance you can see that the third tier or level of the wall temple has a dark arched doorway... surely this is a passage to some secret area!
But sadly, like the cliff temple at the first colossus arena (Valus) this temple also has no door... it's just a 'false' door that doesn't lead anywhere. So in the video I warp Wander up then float down with the chute a few times passing the false door. In the early days (before we could explore places like these), there was a lot of speculation about where this door might lead... if only we could reach it somehow!
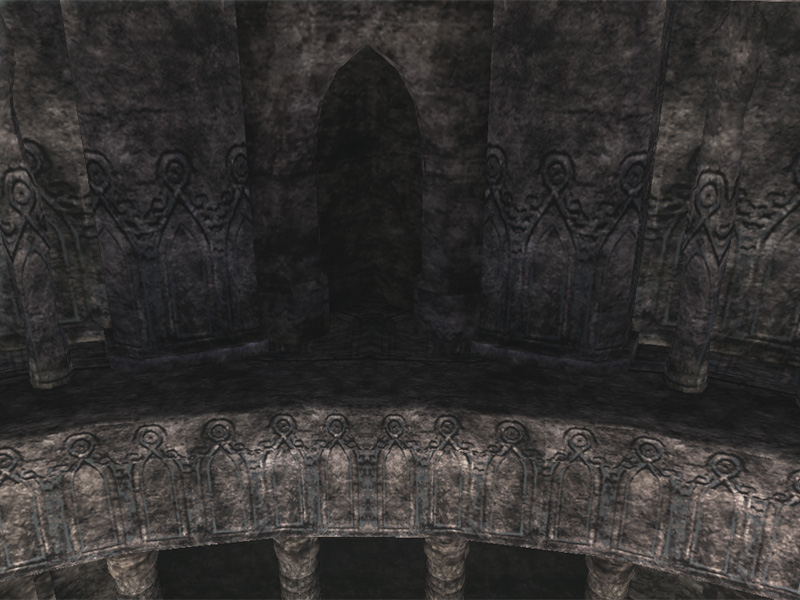
Mysterious closed off door at the top of the temple
110) C2 Cenobia Trials - Uploaded 9th November, 2009
You can hear how slow this video is via the music score, my emulator was having a hard time with this! Yet, even so, it's one of my more impressive early videos from the time I think. I launch Wander up from the trigger point then land on the stairs in front of Cenobia (the same as in video 182 above). Next Wander is standing on top of the long narrow building in the centre of the arena and then warps right next to the inactive Cenobia. The cutscene starts and you can see Wander just standing there on the platform.
Now Wander is on top of the temple and Cenobia is down below (the situation has reversed). Cenobia runs towards the temple, but just gets stuck at the bottom of the stairs... it just keeps running on the same spot. Wander shoots some arrows at the colossus, but nothing happens.
Next, we are at the stone platform with one solitary column (I called this the 'Rook' platform as the column reminds me of that piece on a chess board). But its twin column has been broken in times past and now lies sunken deep into the grass...

Second broken column fell many years ago it seems
So Wander is on top of the Rook column and Cenobia is trying to ram it. But as with the main temple it just runs on the same spot and Wander is totally safe up here! Next we see Wander is riding Agro towards the main temple on the South side of the arena... suddenly Cenobia appears and rams into Agro, causing Wander to fall off, he jumps towards the head of Cenobia, but then the video changes again.
I remember why I recorded the next part. It was a request from someone at the time, I think it was a comment left on one of my videos for Wander to jump up really high so the whole city complex could be viewed at once. It was so much fun running around at the very top of those platforms and arches back then, I'm so glad they were solid ; )
111) G5 On Hills Leading to #4 - Uploaded 11th September, 2009
Pretty bad quality video this one... I'm up on a high ledge above the narrow valley pass that leads to the 4th colossus (Phaedra). There's no way to freely run around up here, you are just pushed to the edge until you fall off (molasses)... even so this place reminds me of the E3 forest in some ways and still has a mysterious quality to it. There is a huge amount of land to explore up here.
112) F2 Top of Rock Promontories - Uploaded 11th September, 2009
There are two tall natural rock formations West of the large stone bridge in F2, I called them promontories but this isn't an accurate label as promontories are land that jut out into a lake or ocean... the correct label is Hoodoo (a tall thin spire of rock that protrudes from the base of deserts). In any case, I jump hacked Wander to the top of these and tried to explore them. However my exploration nemesis was again present here (that damn molasses)! So there isn't much to see in this video.
113) F8 Malus Before Activation - Uploaded 11th November, 2009
I posted this message on the Playstation forums at the time: Check it out guys! Malus before activation (Andrew: I finally did it!) Well, I had tried to get to Malus before it was triggered in the past but had always failed, but this time it worked and I found myself in Malus' arena in the daylight! This was the first time anyone had ever seen the arena in the daylight 'with Malus' as far as I'm aware... was an amazing moment for me so early on ; )
Of course, Malus is a ghost before it's activated (like a lot of the other colossi) but when you run up the ramp just below it, the cutscene still plays as it does in the game. I run around for a while showing that the colossus has no substance, jumping through it, throwing harpoons and even showing the inside of its huge feet! Finally, I trigger Malus, jump hack to its base then jump hack to its head and stab twice with the Queen's sword for the killing blow!
114) H4 Avion Hills (Reprise) - Uploaded 11th September, 2009
Here I have jumped out a lot further out from the edge of the cliffs outside of Avion's arena (see video 27). This was achieved by performing a really high jump hack then using the chute to float down as far North as I could get. I could have tried to 'warp' Wander Up and North but I guess I forgot here... Wander floats down through the textures to his death! Next we see Wander rolling across the surfaces! This actually turned out to be another way to explore some off limits areas. More on this later.
115) F0 ICO Castle 2D Texture - Uploaded 12th September, 2009
Since the first players climbed up the side of the temple and reached the top of the bridge, then spent 8 minutes running North to the Entrance temple, they noticed a strange blurry mountain in the distance. Some people thought this resembled the castle from ICO, others thought nothing of it. But the idea persisted and became a staple of SotC speculation and debate. I see no evidence that this has anything to do with ICO, it's just a low res 2D mountain texture to put some landscape behind the Entrance temple, that is all. I made a short sequence about it in a later video (October 2014):

Blurry mountain texture in the distance
116) C6 Mountain Trek (Part 1) - Uploaded 13th September, 2009
I start out on the very Western tip of the C6 plateau then 'jump hack' up onto the cliffs. I then run East along the edge of the cliffs as far as you can go, then turn South and run some way before the video ends. There are some amazing places up here, filled with bushes and vegetation, almost like a mini forested area. You can run to the edge of the cliffs for some epic views of the landscape!

Nice view of the surrounding landscape at C6
I finally found a way to get through those annoying 'Molasses' areas! I just made Wander jump hack up a little beyond the height of the surface he is standing on... then push the controller in the direction I need to go. Wander will 'hop' over the molasses areas and continue until he can run normally across the terrain. I end up using this technique in some of my subsequent videos.
117) C6 Mountain Trek (Part 2) - Uploaded 13th September, 2009
In part 2 I'm still running South along the edges of a huge void pit on my left, past many strangely shaped textures, some jutting up at acute angles, others making strange turns... but I avoid these and keep going on the safest path until I reach the edge of some high cliffs at 2:30 in the video.

Wander high up on the cliffs looking down (in D6)
Wander has actually moved out of the C6 map square in D6 here. This plateau is so vast it spans three map squares on the world map! I've said it before and I'll say it again... why did the devs put all these huge explorable areas into the game then deny players any access to them? I mean I know from the 2D plants and bushes you are not meant to get here... still these places have their own beauty, and I had a lot of fun exploring them ; ) Next I'm exploring the edge of the cliffs in D7, then run along the very Southern cliffs and then head back the way in which I came.

Wander has moved into D7 here - the 'Southwestern save shrine' in the distance

Wander looking back at the C6 plateau
118) C6 Mountain Trek (Part 3) - Uploaded 13th September, 2009
In part 3 I seem to spend a lot of time running back the way I came, retracing my steps... then at 2:48 I am down at the lower level of the cliffs - before I was exploring the higher levels. So from here I run along the lower level South again with a void pit on my right. I fall into a void pit then continue on... at the end I fall into another void pit, then run into those 'rolling' textures again! Wander spins over and over until he falls to his death!
119) C6 Mountain Trek (Part 4) - Uploaded 13th September, 2009
Part 4 is a very short video (should have been added to part 3)... Wander is again running South (as in part 1 & 2) but I'm taking more risk here as he runs out beyond surfaces onto invisible textures... At 1:02 Wander is running back North to the edge of the plateau, and then falls down the cliff face back to the ground where Agro is waiting for him ; )
120) F4 Shifting Wander - Uploaded 14th September, 2009
An update to my 'Hilarious Wander & Agro Glitch' video 17. It's really simple... all I have to do is use Wander's position co-ordinates while on Agro. So while riding on Agro I change Wander's up/down co-ordinates for example... Wander will move down under the ground or move up high above the horse - the reins of the horse are stretched out and still linked to Wander. If you move East or West, Wander will start to orbit around Agro ; )
121) B8 & J8 Blue Lands - Uploaded 17th September, 2009
These mysterious blue lands were first seen after the solid H8 map square (invisible lands) were discovered by Sid-tiger in October 2008. They exist in the bottom left and right corners of the map and appear to be placeholders for the ocean (hence their blue colour). I jump hack from D8 (a solid square) to B8 but these blue map squares are 'freeze' zones, so Wander gets stuck! You can open the parachute for some reason though. Next I jump from H8 to J8 - again Wander freezes surrounded by a sky blue coloured sea.
122) D8 Invisible Lands - Uploaded 17th September, 2009
I start on the Southwestern Cape save shrine at D7 then 'warp' South to land on the solid D8 map square. To this day there is still no good explanation why the H8 and D8 map squares have collision detection. They are out of bounds and not accessible in the game (except H8 in the NTSC version via what appears to be an unintended action). I then basically explore the perimeter of the map square looking for anything unusual. At the end of the video Wander is running up an invisible slope high above the ocean below. There are still some leftover cliff collisions here, but without knowing where to climb it's hard to navigate! Wander ends up falling to his death (yet again ; )
123) D7 Mountains West - Uploaded 17th September, 2009
This outcropping of rocky hills is behind the Southwestern save shrine which overlooks the high cliffs and ocean at D8 (where we were just exploring ; ) It's actually possible to Agro launch up to these cliffs legitimately in all versions of the game. I know of two places you can launch up there but they require a 'standing' Agro launch (i.e. Wander stands up on the horse right before he launches himself up to the ledge). Again, it's just barren rock up here but a large area to explore.

D7 mountain from a distance
I wonder if the developers knew you could Agro launch up here? I mean there are no 'molasses' areas or void holes up here so Wander is free to run around. But there is not a single bush or shrub to be seen, just an empty wasteland. I know the PS2 memory constraints were a big issue at the time, but just imagine if they had put something special up here... I don't mean an item or weapon, but say evidence of a previous explorer! An ancient burnt out fire where someone once camped with battered old supplies scattered around now rotting away... or perhaps a fossilized skeleton? Would have been amazing!
124) D7 Mountains East - Uploaded 17th September, 2009
Further East is another mountain right on the cliffs of D7 overlooking the ocean. This one has a huge diversity of different features, such as cliff walls, huge boulder-like structures, crevices, flat plains and craggy cliffs; whereas the previous D7 mountain was basically a large flat table top like plateau. So you might get bored watching this one (yawn)! But, as mentioned before, there is so much land that was not explored... unless you have been up here and experienced it first hand (as I have), you can't appreciate the extent of the landscape.

D7 mountains East

Edge of cliffs looking West
125) H8 Invisible Lands - Uploaded 17th September, 2009
I start where I left the last video at D8. I then warp Wander East to H8 leaving a lovely straight line across 4 map squares! I then explore the perimeter as I did at D8, strangely I didn't see the beta mountain at the NE corner of the quadrant, most likely due to the intense bloom effect. I warp along the South edge, then North back to where I started.
126) I2 The Dam - Uploaded 18th September, 2009
First ever video I made about the Beta Dam that Pikol discovered in February 2009. I put Wander on the large stone bridge then 'jump hacked' him East to the Dam. I was a little off target as I arrived 'behind the Dam'. It's not until 1:09 in the video that I make it to the front of the Dam! Then you will see Wander floating down in front of the Dam over and over... each time changing where he appears based on where I sent him. Note: I was trying to replicate Pikol's video but in this first attempt didn't seem to get there!
127) G3 East Side Mountains - Uploaded 18th September, 2009
Here I warp Wander East again from the bridge, this time to the East side of the G3 mountains. I wanted to see if Wander could land there to find any evidence of explorable areas, alas it was not to be! I tried different values in the hopes of landing somewhere, but it seems there are no collisions there.
128) J3 Beta Mountains - Uploaded 18th September, 2009
Again I warp from the bridge East, this time to the J3 beta mountains. Unfortunately I didn't adjust my height so Wander appears under them. At the time I wasn't really sure what I was looking at so it never occurred to me that I needed to be higher xD. Quite embarrassing now, but back then I was still a n00b when it came to exploring these far off lands! It's also worth noting that the beta mountains in the J column are within a 'freeze' zone, so Wander gets frozen in place each time I warp him there.
129) J5 Beta Mountains - Uploaded 18th September, 2009
This time I warp from Phaedra's arena, but again I'm under the mountains... You can still get a sense of the landscape, but of course they were never meant to be seen from this perspective!
130) J7 Beta Mountains - Uploaded 18th September, 2009
I warp Wander from the Southern cliffs directly East to J7. This part of these beta mountains are not in the 'freeze' zones, so Wander can float around there and see the mountains. But again, I'm at the same ground level I warp from, so I just float through the dirt floor of J7, robbing us of any good footage of this area (again n00b)! However, at 1:13 in the video I warp to the North end of J7 which features a huge flat area with high cliffs, but here we have moved back into the freeze zone.
131) E6 Riding Phalanx Under the Sand - Uploaded 18th September, 2009
This was another 'TresDias' request. I had never considered this before so I gave it a go. The results were very interesting! Once I warped Phalanx under the sand (with Wander still holding on), I was surprised at how tranquil it was down there... the music reverts to 'Silence' as if Phalanx is floating above the sands. Wander can move about on the colossus, but a strong wind pushes him back. I tried to make it to the head, but just couldn't manage it. Also the bloom in this video is way too bright!
After a while Wander is violently rejected from the colossus and falls to his death! No matter how much I try to hold onto its fur, it's no use! Wander is unceremoniously thrown from the colossus!
132) H8 Blue Triangle - Uploaded 18th September, 2009
Yep! Not much to see here... Wander again warps from the Southern cliffs to that weird blue triangle which exists at the upper left corner of i8 on the world map. So really it should be called the 'i8' blue triangle, but since you can see it from the H8 invisible lands, the name has stuck.
133) F8 Far Ends of Walkway at #16's Arena - Uploaded 19th September, 2009
This was something new! I don't think anyone had been here before! I jump hacked high up then floated down to the other ends of the arena that are blocked by a huge gap to the East, and a huge rock to the West. So I explore these never before seen areas, and run all the way to their ends. You will see some different perspectives from these off limits areas, but not much else.
134) E5 Mountains (Addendum) - Uploaded 19th September, 2009
In video 96 above, I explored most of the Southern parts of the E5 mountains, that is those parts that are closest to the desert at E6 (where we fight Phalanx) and also where we find those little pools (or ponds) of water. But in this video I explore the huge plateau that is adjacent to the Southern cliffs. It's a huge area to explore and hence my video runs for over 7 minutes. But I pretty much cover all there is to see.

E5 mountains plateau - a vast expanse to explore!
135) F8 Under the Stairs at #16's Area - Uploaded 19th September, 2009
A little secret area I found by warping Wander under the stairs that lead up to the collapsible bridge. Not a huge space to explore but was cool to see for the first time. The wall textures flash on and off depending on where you move as you are not supposed to see them from this side, but it allows Wander to see under the large stone bridge. When I jumped down to the lower levels of the bridge I was surprised to see this caused it to collapse!
I posted this comment on the PS2 forums at the time: I also found a hidden area under the stairs at 16's area. It's like a little temple down there with stairs and rooms and it leads to the supporting columns under the bridge. You can actually cause the bridge to collapse from down here as well - which was a surprise!
CerealAndMilk posted: I stayed up till like 12 o'clock last night watching like 30 of nomads videos on my iPod. Good job man!
136) E1 Inside a Save Temple - Uploaded 21st September, 2009
I start on top of the 'Dried Marsh' save shrine at E1 then warp Wander inside it. There isn't much room to move around and it's hard to position the camera just right to see inside, but you can see the back of the save stone from here and the floor is invisible.
137) I2 PAL Version - Uploaded 21st September, 2009
I had tried to reach the beta Dam in a previous attempt but failed. It appears I warped Wander too far North (where a crash area is present in the game), so the screen went black. Another attempt failed as the bloom was so intense out there at i2 I couldn't see anything... but the third time's the charm as they say! So again, I start on the main stone bridge and warp Wander East to the Dam. The first two attempts put me behind the Dam, so it's not until 1:17 in the video that I make it to the front of the Dam. But I was the first person to confirm the Dam's existence in the PAL version (yay!)
Pikol commented:
@Nomad, since you got the PAL version of the game, have you reached the Dam in it ?
I replied:
Pikol: Wow, that was easy this time - I just confirmed it, the dam is in the PAL version! I recorded it if you need proof but it's identical to the NTSC version.
138) G1 Behind Doors at #15's Area - Uploaded 22nd September, 2009
Here I use Wander's gravity codes to warp through the fake stone door (or recessed arch) to reach another hidden area. There is a small space (room if you will) here but it's empty... and again (like video 133), the wall textures flicker on and off. Still, a cool little never before seen area ; )
139) D1 Hydrus Hills & Towers (part 1) - Uploaded 23rd September, 2009
This video is quite long and has four main parts. The first part is Wander running through molasses on a hill just outside the Hydrus arena. The next part is better, as Wander gets up close to some of the stone towers perched up high on the cliffs in D2 and also showcases Wander gliding down past the towers at the back of Hydrus' arena. Then I found (what I thought) was a high path that might lead to something special... but it didn't. Wander hugs the cliffs until he is forced back down to ground level. The last part is Wander trying to find a solid surface that he can follow in an attempt to reach the Hydrus towers... but he just ends up falling into void pits over and over.
140) D1 Hydrus Hills & Towers (part 2) - Uploaded 23rd September, 2009
From the previous location in Part 1, I warp Wander North to the meandering path at the back of Hydrus' arena. It's a grassy path that snakes around the Northern cliffs. I always loved this area and wondered if it was once 'explorable?' But it's a 'push you off' molasses nightmare here! I try again and again to find a spot I can explore, and I do explore this path to a degree... as Wander struggles to run up the molasses path. Next I'm falling down behind the path, taking a look at the towers in the few seconds it takes for me to float down into the lake. Hydrus can be seen in the distance before activation.
141) D1 Beta Mountains East - Uploaded 25th September, 2009
First I jump up onto the Entrance temple platform then proceed to warp Wander East into the G0, H0, I0 and J0 map squares to take a look at the beta mountains there. Sadly, I'm still under them! Really had no idea what I was doing back then xD. You can still get a good sense of what they looked like however, but of course they are not meant to be seen from underneath...
Next, I'm further South on the bridge. I used to line myself up with where I wanted to warp East as it was easier. I check out a couple of more areas (under then of course) until the video ends.
142) D1 Beta Mountains West - Uploaded 25th September, 2009
Same deal as the above video except this time I'm warping West to the A0, A1, A2 and A3 map squares. If I could go back in time I would berate myself for not understanding that I was under the beta mountains!!! Only at A3 am I above them. Oh well... it is what it is I guess, and I can't change the past.
143) C2 Mountains (Reprise) - Uploaded 25th September, 2009
In this video I approach the C2 mountains from the Northern path leading to the E5 forest. I run up the cliffs as far as I can go then jump hack up high and land on those rolling brown rocky mountains. I then head East until I get to the edge overlooking C1 (Umbrial Glade), then head South as far as I can go. There is a point you reach where the landscape changes to 'molasses', so I 'Wander hop' to get through it. Not much to be seen here except two dead trees jutting out of the bare rock. You can still run in the molasses areas for a time before you are finally pushed off.

Twin dead trees against a desolate landscape!
Next I'm running up to the highest point of the cliffs to get a nice view of the surrounding areas, especially the line of dark columns that snake towards the entrance of Cenobia's arena (#14th boss). I fall through a void until I finally run back down to the surface where Agro is waiting.
144) C2 Invisible Area Under #14's Entrance - Uploaded 25th September, 2009
I start under the entrance to #14's arena (Cenobia) and then try running in different directions to see how far I can get. I use my 'Wander hopping' technique to get through the molasses areas... in fact nearly all of this area is molasses! But you can see the tunnel leading from the entrance to the small lake with the island (from the outside)... so that was significant at the time I think ; ) You can also see the underside of the columned path from below with the base of the columns just peeking below the surface.
145) C2 Inside Structures at #14's Entrance - Uploaded 25th September, 2009
I start on the narrow cliffs above the entrance platform trying to find purchase up there, but there isn't much room to move and you can see they are just a facade... next I warp Wander down through the roof (top) of a variety of structures found in this arena. You can see there's just grass beneath and from the inside the textures flicker on and off and I still have trouble getting the camera to move into these narrow structures from the outside. This video is an extension of what I did back in (video 133). At the end I warp through the structure Cenobia starts from, but it seems there is not much room to move around there? Wander keeps falling into the void.
146) F3 Underwater at #2's Area - Uploaded 26th September, 2009
There is an invisible wall about half way out past the waves in the lake where you fight the 2nd boss (Quadratus). I warp Agro out there and she falls to the bottom of the lake where it's quite dark and murky... I run along the invisible wall until you end up at the western most beach in the arena. Here there is a small area under the waves that is crystal clear (not murky like the rest of the lake), you can see the waves breaking above Wander and Agro here - pretty cool!
At 2:40 in the video Agro falls too far to the bottom of the lake causing Wander to fall off and get stuck helplessly in the strong tidal forces that push him back to the shore. Wander rolls over and over with no way to escape! Then I try warping Agro 'beyond' the invisible wall which results in some strange effects. Agro is frozen in place like a statue and when Wander dismounts they both die! So beyond the invisible wall is a 'death' zone. I was actually trying to get to that gap in the mountains where there is a small dam like structure (culvert). But in the end I fail... however I delve into this area in future videos.
147) B6 Riding Agro Under the Ocean - Uploaded 26th September, 2009
This is basically the same video as above but at B6 (the ICO beach). Again there is an invisible wall surrounding the beach but you can ride Agro pretty far out into the ocean. Agro seems sluggish and slow to move out here, hence my constant kicking her onwards with Wander's constant 'Ya' intonations! You can see at 2:40 on the pause map just how far West Wander is! At 4:02 I again try to warp Wander and Agro 'beyond' the invisible wall with similar effects as the previous video... but this time instead of a 'death zone' here there is no floor, so Wander and Agro just fall into the void.
148) C3 Pond with Agro - Uploaded 26th September, 2009
More underwater adventures! This time at the small lake (pond) at C3 that has some fish swimming around, turtles waddling along on the shore and a hawk flying overhead. Seems this area is full of life! Lots of animals and a nearby fruit tree as well. So Again I warp Agro into the centre of the pond and watch as the fish swim around. At 1:23 you will see I have shot a fish with my bow and arrow... next Agro is bent up in a weird position on a steep gradient before riding through the pond and out again.
149) F4 Top of Shrine of Worship - Uploaded 27th September, 2009
The emulator was 'straining' when recording this! Seems that up on this high perch, way above the garden below there might be too many polygons to render? Not sure, but in any case the video seems to shudder a lot as Wander moves. But this was a followup video to a video that WWWArea had already posted... here: https://www.youtube.com/watch?v=_uTfTHE6iEs (February 19th, 2009), three months before I even started! Amazing! Remember players had four years on me to make discoveries, and this was one of the better ones!
At the end of the video I attempt to warp down to the bottom of the circular opening in the Secret Garden. I try a few times but Wander ends up dying on each attempt! In a later video I make it down there intact.
150) F3 #2's Area Mixed bag - Uploaded 30th September, 2009
This is a much longer video than normal (8 minutes 36 seconds), and probably should have been broken up into smaller videos, but as it's all about the F2 quadrant and Quadratus (#2nd boss). (1) I jump through a gap in the cliffs and float down past Quadratus to view it before activation (as shown in video 68) with better quality footage this time around. (2) I jump up onto the bridge then jump down onto those large rocks that skirt to the Northern hills above the arena, but Wander dies when he lands on them (death cliffs). (3) I warp Wander through the grass to reach the back end of Quadratus' cave. First attempt fails but then I make it... Wander rolls down the top levels of the cave (off limits) then lands inside the cave triggering Quadratus.
(4) Wander climbs up a small tree protruding from the rocky surface - you can hear the 'wooden' sounds as he runs around... then he runs to the area above the cave, floats down and triggers the colossus. (5) Next I jump to an off limits bridge support high above the beach, but the cliffs that adjoin it are the death cliffs! (6) I warp into a curved support of the bridge and follow it down to its base. Crazy how I just checked out everything back then! What secret could be hidden inside a bridge support? The answer is it's a place Wander can explore so that was enough for me ; )
(7) I'm back warping Agro underwater as in video 144, but again Wander and Agro freeze when warping beyond the invisible wall. (8) Next, I jump up onto the bridge with the idea of watching Quadratus walk around the beach from this high vantage point... but it seems I'm too high here as the colossus unloads. Finally I bring Agro up to the top of the bridge then ride her towards the temple entrance door. Then I warp Wander down under the platform and land on one of the curved supports, Wander is pushed off and lands safely on the cool green grass below - Whew! That was a lot to discuss!